Craft Supply Storage Ideas for Small Spaces: 10 Systems That Fit a Corner, a Closet, or a Cart
The short answer
Craft supply storage ideas for small spaces work best when you stop trying to build a craft room and start building a craft corner instead. A 3 by 3 ft corner, about 9 sq ft, holds the whole system: a rolling cart on the floor, a pegboard on the wall above it, and a handled caddy that carries your daily tools to the table and back. That is the short version. The longer version is the ten ideas below, each one rated for how much space it eats and how much of your deposit it risks. The starter kit for the whole setup costs $90.49 with prices checked in November 2026, and the cart upgrade adds $39.99. Everything here is renter friendly unless the idea says otherwise, and every idea was picked because it works in a shared room, not just in a spare bedroom you do not have.
How much does craft supply storage cost?
Prices checked in November 2026 from retailer listings. These craft supply storage ideas for small spaces stay cheap because a starter kit needs only four buys, and the cart is the one upgrade worth paying for later.
| Item | What it does | Price (Nov 2026) |
|---|---|---|
| Handled felt caddy | Carries daily tools to the table and back | $21.00 |
| Sterilite Large Clip Box, 6-pack | Clear latching boxes for category zones | $39.49 |
| Hardboard pegboard, 4×8 ft sheet | Wall storage, cut to 24×36 in | $15.00 |
| 43-piece pegboard hook kit | Hooks, bins, and baskets for the board | $15.00 |
| Starter kit total | Corner system without the cart | $90.49 |
| IKEA RASKOG large trolley (optional upgrade) | 3-tier rolling cart, 13.75 x 17.75 in footprint | $39.99 |
| Full setup total | Starter kit plus the cart | $130.48 |
Budget alternatives if the kit still feels steep: an Amazon Basics 3-tier cart runs about $25, and a Target Threshold metal cart runs about $35. A metal pegboard panel costs about $43 if you want a board that will never sag, but the $15 hardboard sheet does the same job for light craft tools. Plan on one weekend afternoon to set it all up, about 2 to 3 hours, and a 10-minute reset after every session. That reset is the whole secret. A system you cannot put away in 10 minutes is a system you will stop using.
10 craft supply storage ideas for small spaces
1. Build the three-kit system first
Sort by how you create, not by what you own. Your Core Kit holds the tools you reach for every session, scissors, a ruler, glue, a craft knife, and lives in the handled caddy. Each Mode Kit holds one kind of making, paper, sewing, or vinyl, in its own clear clip box. Each Project Kit holds everything for one single project in one box, pattern, cut pieces, and the exact supplies you already chose. When a project ends, the box empties and the supplies go back to their Mode Kits.
Best for: Anyone who makes more than one kind of thing. Main advantage: Setup takes one trip instead of six. Watch out for: Mode Kits creep. Cap each one at a single clip box. Verdict: Start here. Every other idea on this list plugs into it. Deposit risk: 1/5. Nothing touches the wall.
2. Roll a 3-tier cart as your craft station
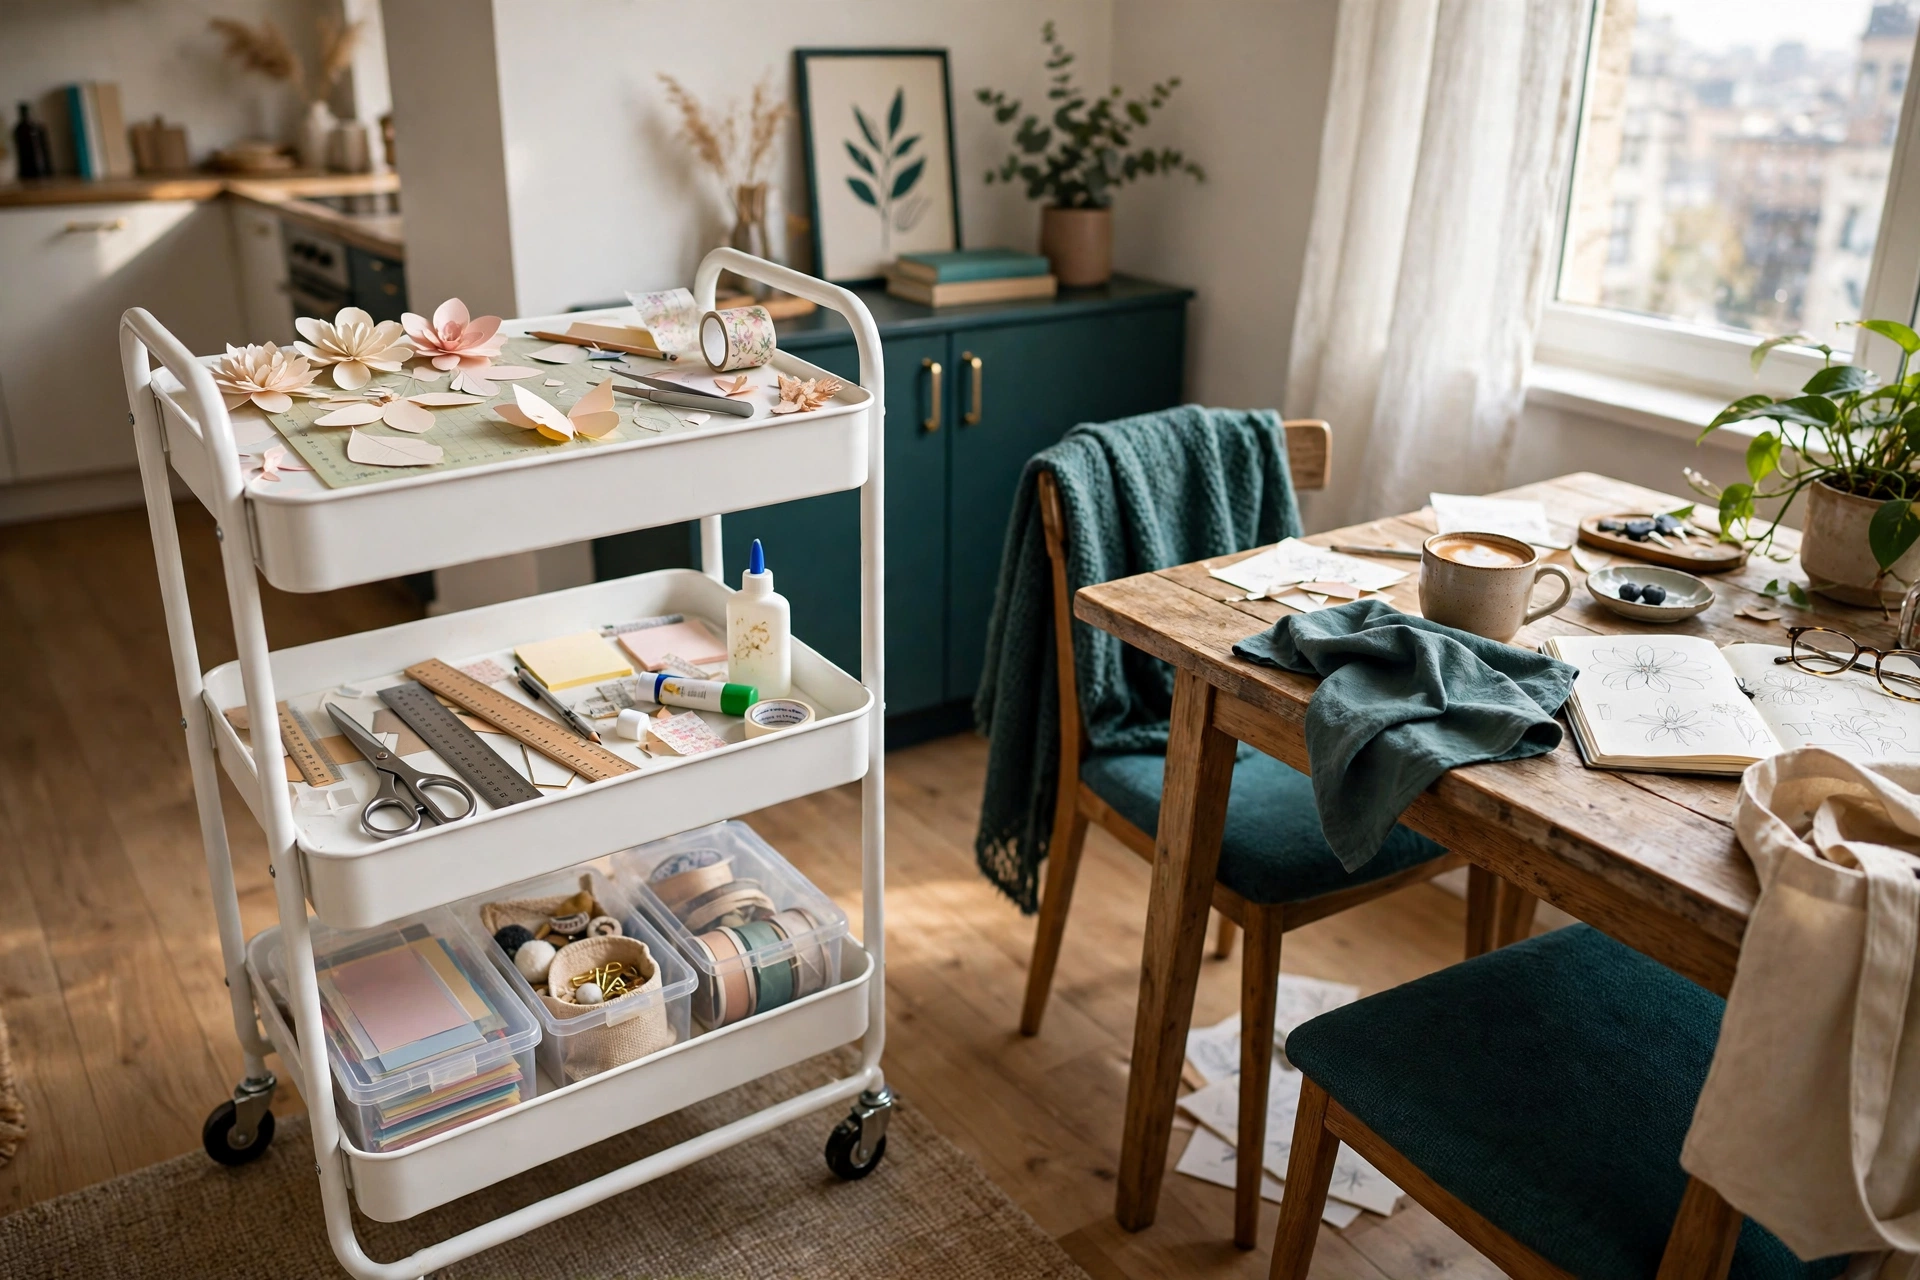
A three-tier rolling cart is the single most useful buy in this whole post. Top tier holds the active project. Middle tier holds the tools you reach for constantly. Bottom tier holds bulk supplies and works in progress. The IKEA RASKOG measures 13.75 by 17.75 in, which is 1.7 sq ft of floor, and it rolls to the window for daylight or to the sofa for an evening session, then tucks beside the table when you are done. At $39.99 it costs less than most single-purpose craft furniture, and it works in a kitchen, a bedroom, or a living room corner. The budget carts at $25 to $35 do the same job with slightly thinner steel.
Best for: People who craft at the dining table or in more than one spot. Main advantage: The station moves to you. Watch out for: A cart used as storage instead of a project station fills up and stops rolling anywhere useful. Keep one tier empty-ish on purpose. Verdict: Buy this before anything else if you can only buy one thing. Deposit risk: 1/5. It stands on the floor.
3. Hang a pegboard above your work surface
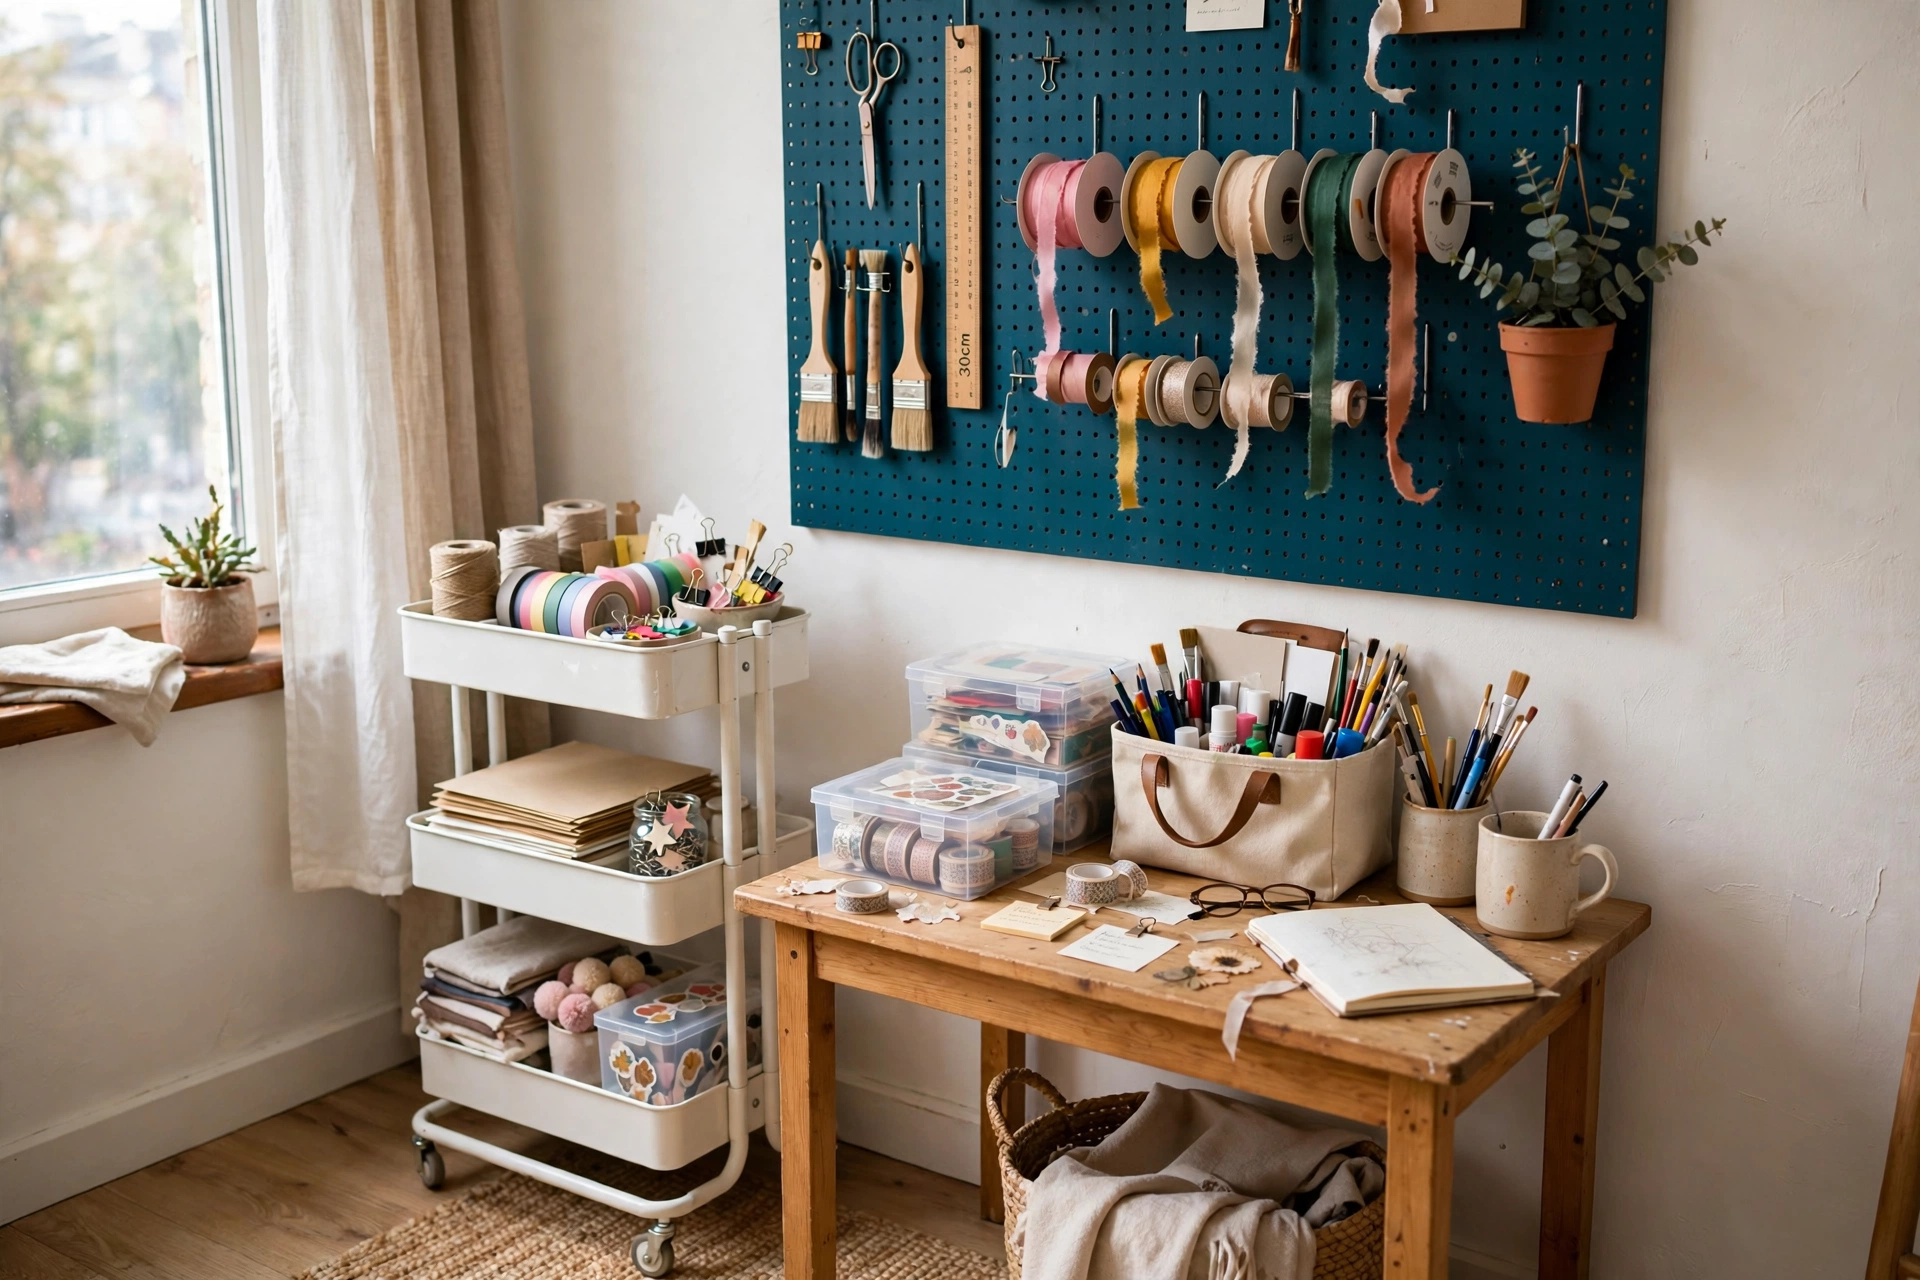
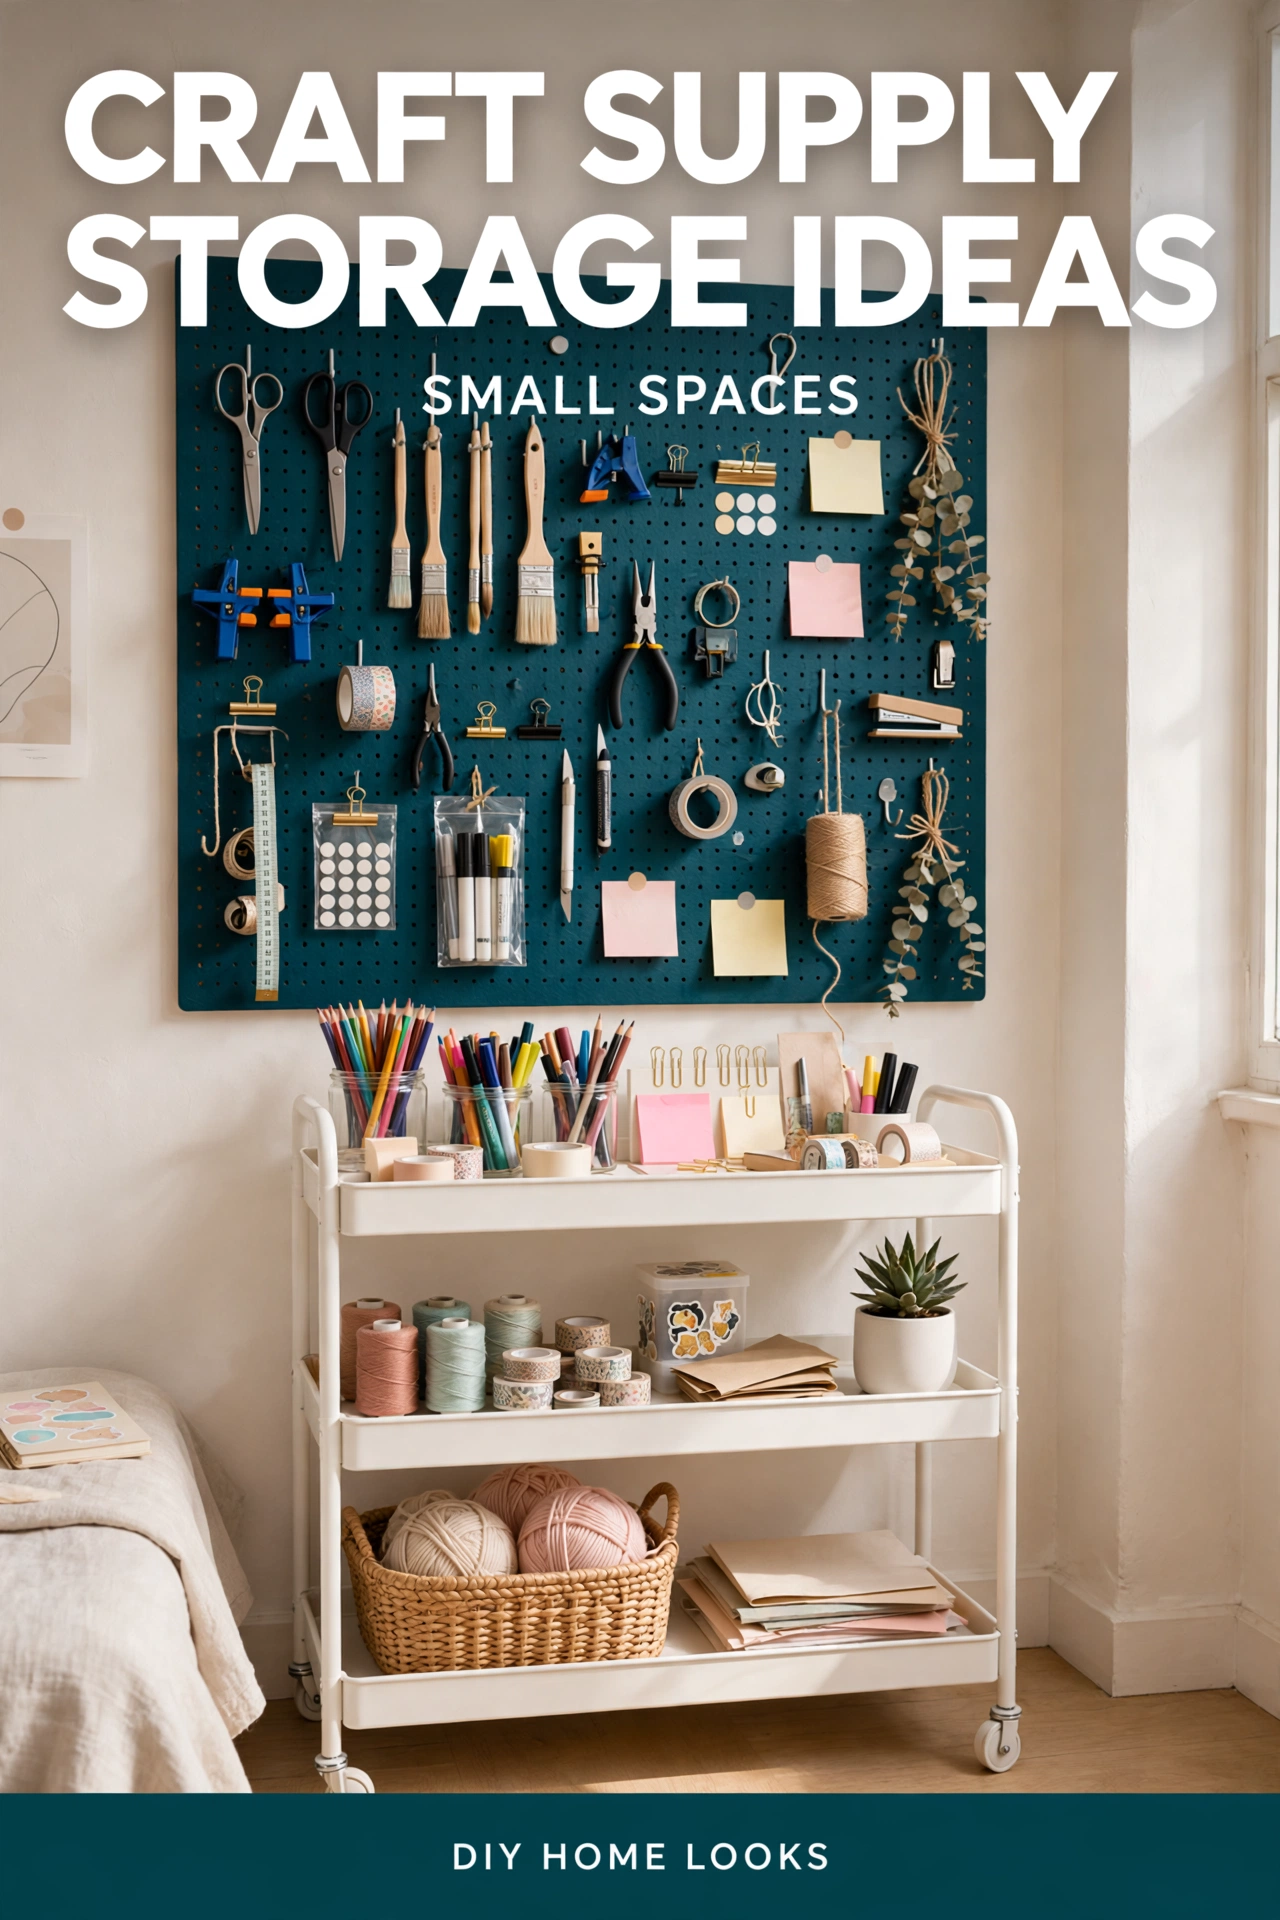
A 24 by 36 in pegboard, about 61 by 91 cm, mounted above your table turns a blank wall into visible, grabbable storage. Scissors, rotary cutters, rulers, paintbrushes, thread spools, and ribbon all hang on hooks and small baskets at arm’s reach, and you can rearrange the hooks whenever your projects change. A board that size holds 30 or more tools without crowding, and it costs $15 for the sheet plus $15 for a hook kit. Mount it on furring strips, thin 1 by 2 in battens screwed into the studs, so the hooks have room behind the board. Hardboard holds light craft tools fine. If you hang heavy items, step up to a metal panel at about $43.
Best for: Daily tools you grab constantly. Main advantage: Zero floor space, everything visible. Watch out for: Drywall alone will not hold a loaded pegboard over time. You need studs or proper anchors, and renters should read the lease section below first. Verdict: The best wall storage for the money, with one honest catch about mounting. Deposit risk: 3/5. Screws into studs need filling at move-out.
4. Store paper vertically like files
Cardstock and scrapbook paper stored in a leaning stack is a slow disaster. Every sheet at the bottom gets bent, and finding one color means lifting the whole pile. Store paper vertically instead, like records in a crate. Magazine files, a desktop file sorter, or a vertical file box all work, and you can flip through paper like a library shelf. A 12 by 12 in paper pad fits a standard magazine file with room to spare. Sort by finish, matte, glossy, and vinyl, not by brand, and cap the scrap pile at one file. When it is full, scraps leave before new ones arrive.
Best for: Paper crafters, card makers, scrapbookers. Main advantage: No more bent corners, and you can see every color at once. Watch out for: Vertical files tip if they are top heavy. Keep the tallest sheets at the back. Verdict: Free to start with files you already own, and it fixes the most common paper problem. Deposit risk: 1/5.
5. Turn a closet into a craft cabinet
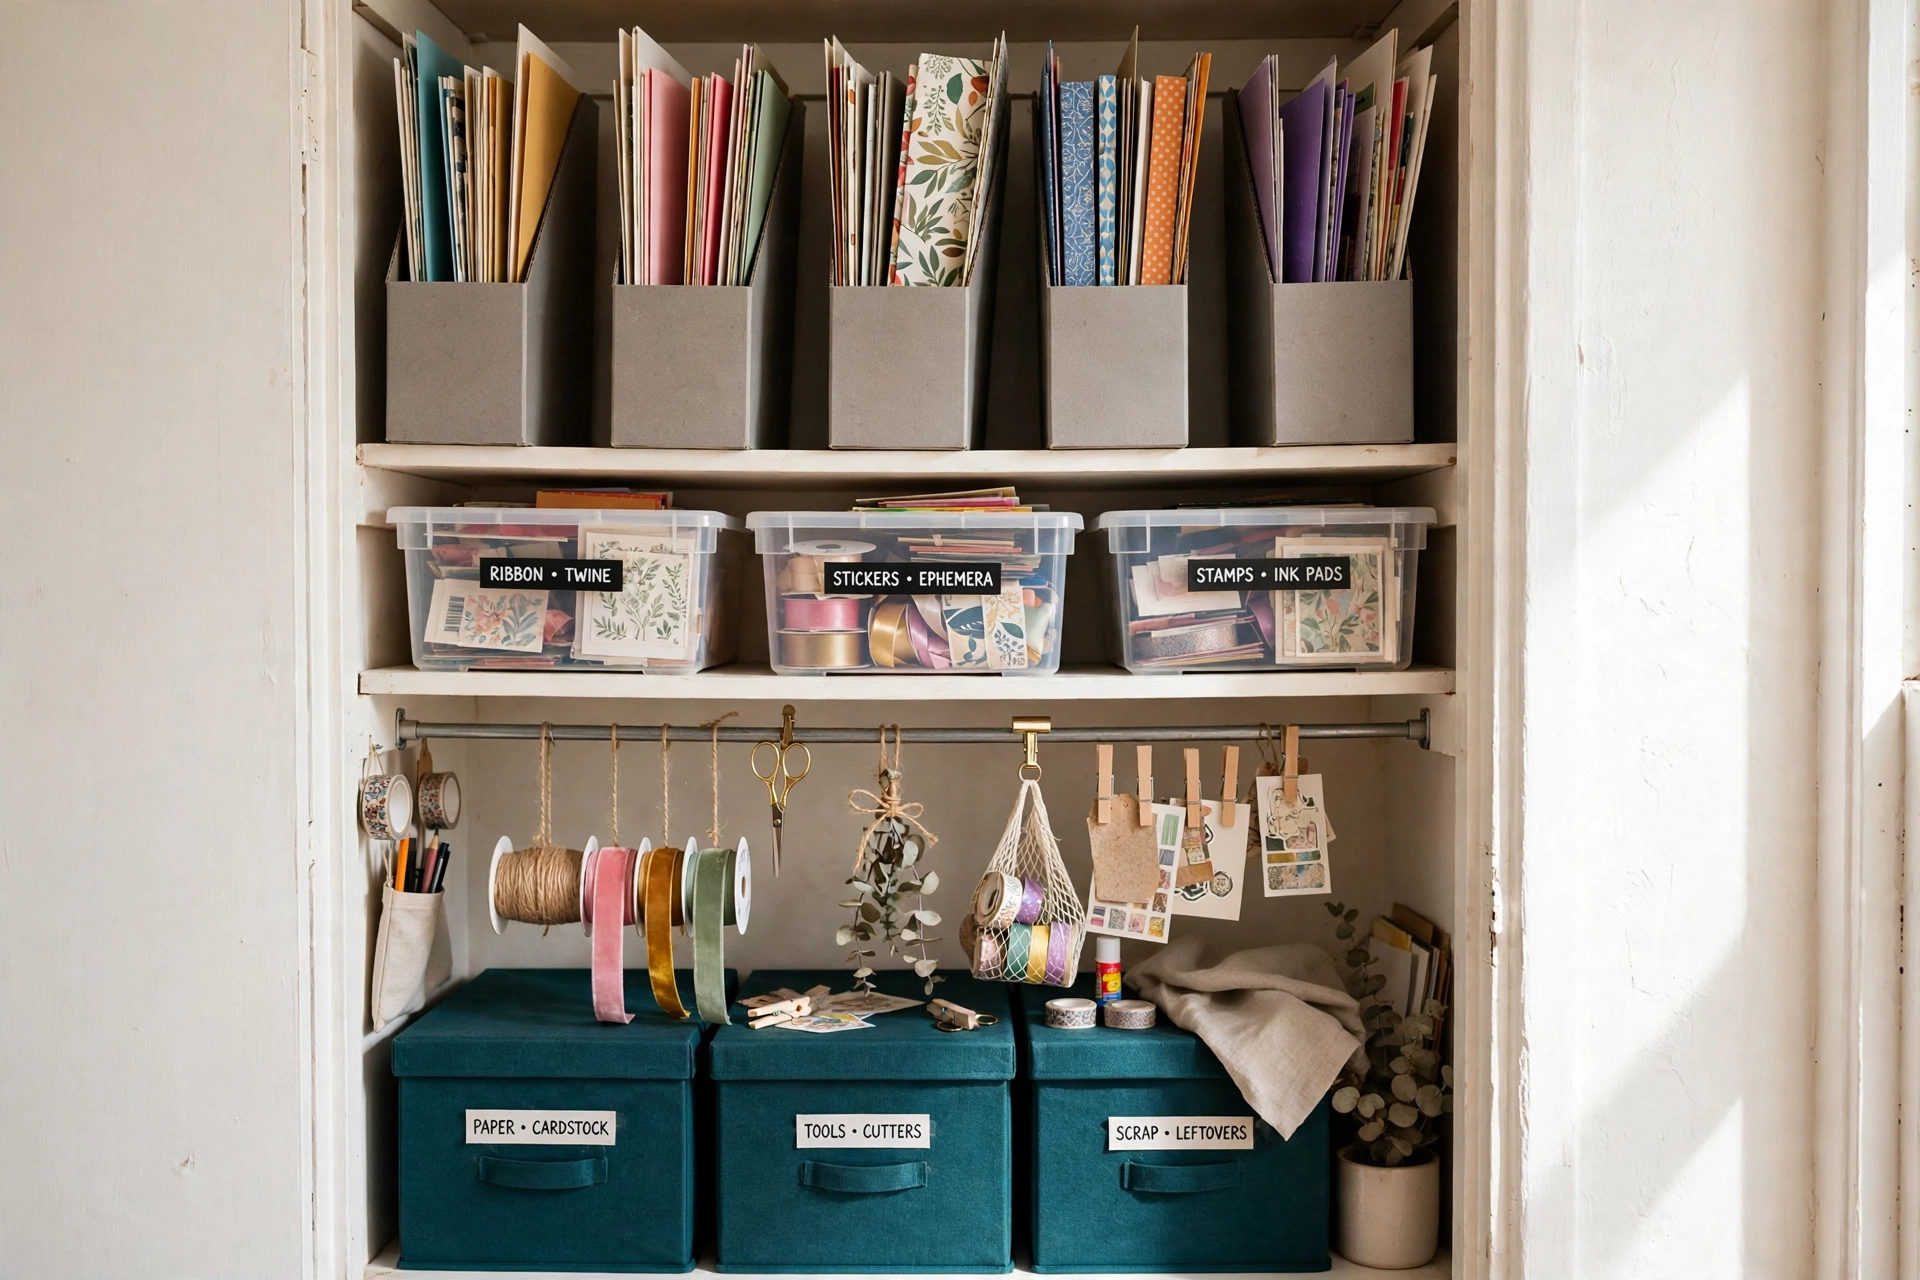
A closet you barely use is a craft room hiding behind a door. Start with a tension-mounted closet rod at mid-height. Below it, put bins and baskets and larger supplies on the floor. Above it, add a single shelf for rarely used tools and bulk refills. The setup works best in closets at least 18 in deep, about 46 cm. Add a fold-down shelf inside the door, or a small table you pull out when you craft, and the closet closes away completely when guests arrive. Our guide to organizing a small closet walks through the rod heights and zones, and this idea just points those zones at craft supplies.
Best for: Renters with a spare closet and no spare room. Main advantage: Everything disappears behind one door. Watch out for: A closet craft station needs light. A battery puck light stuck to the shelf costs a few dollars and saves a lot of squinting. Verdict: The closest thing to a real craft room a small apartment allows. Deposit risk: 2/5. A tension rod leaves no holes; a screwed shelf does.
6. Use an over-door pocket organizer for small supplies
Over-the-door clear pocket organizers are perfect for small items because they use no floor space and come down without drilling. The pockets are typically 4 by 6 in, which holds scissors, markers, glue sticks, washi tape, and small notepads comfortably. Hang one on the back of the closet door or the bedroom door, and put your most-reached supplies in the top rows where your hands land first. The over-the-door organizers we rated for general storage work exactly the same way here, and the craft version just swaps shoes for supplies. Keep heavy items low so the door still swings freely.
Best for: Small supplies that vanish into drawers. Main advantage: Zero floor space, zero holes, fully visible. Watch out for: Overloading the pockets pulls the door out of alignment. If the door starts sticking, move the heavy stuff to a shelf. Verdict: The easiest renter win on this list. Deposit risk: 1/5.
7. Give tiny parts a tackle-box station
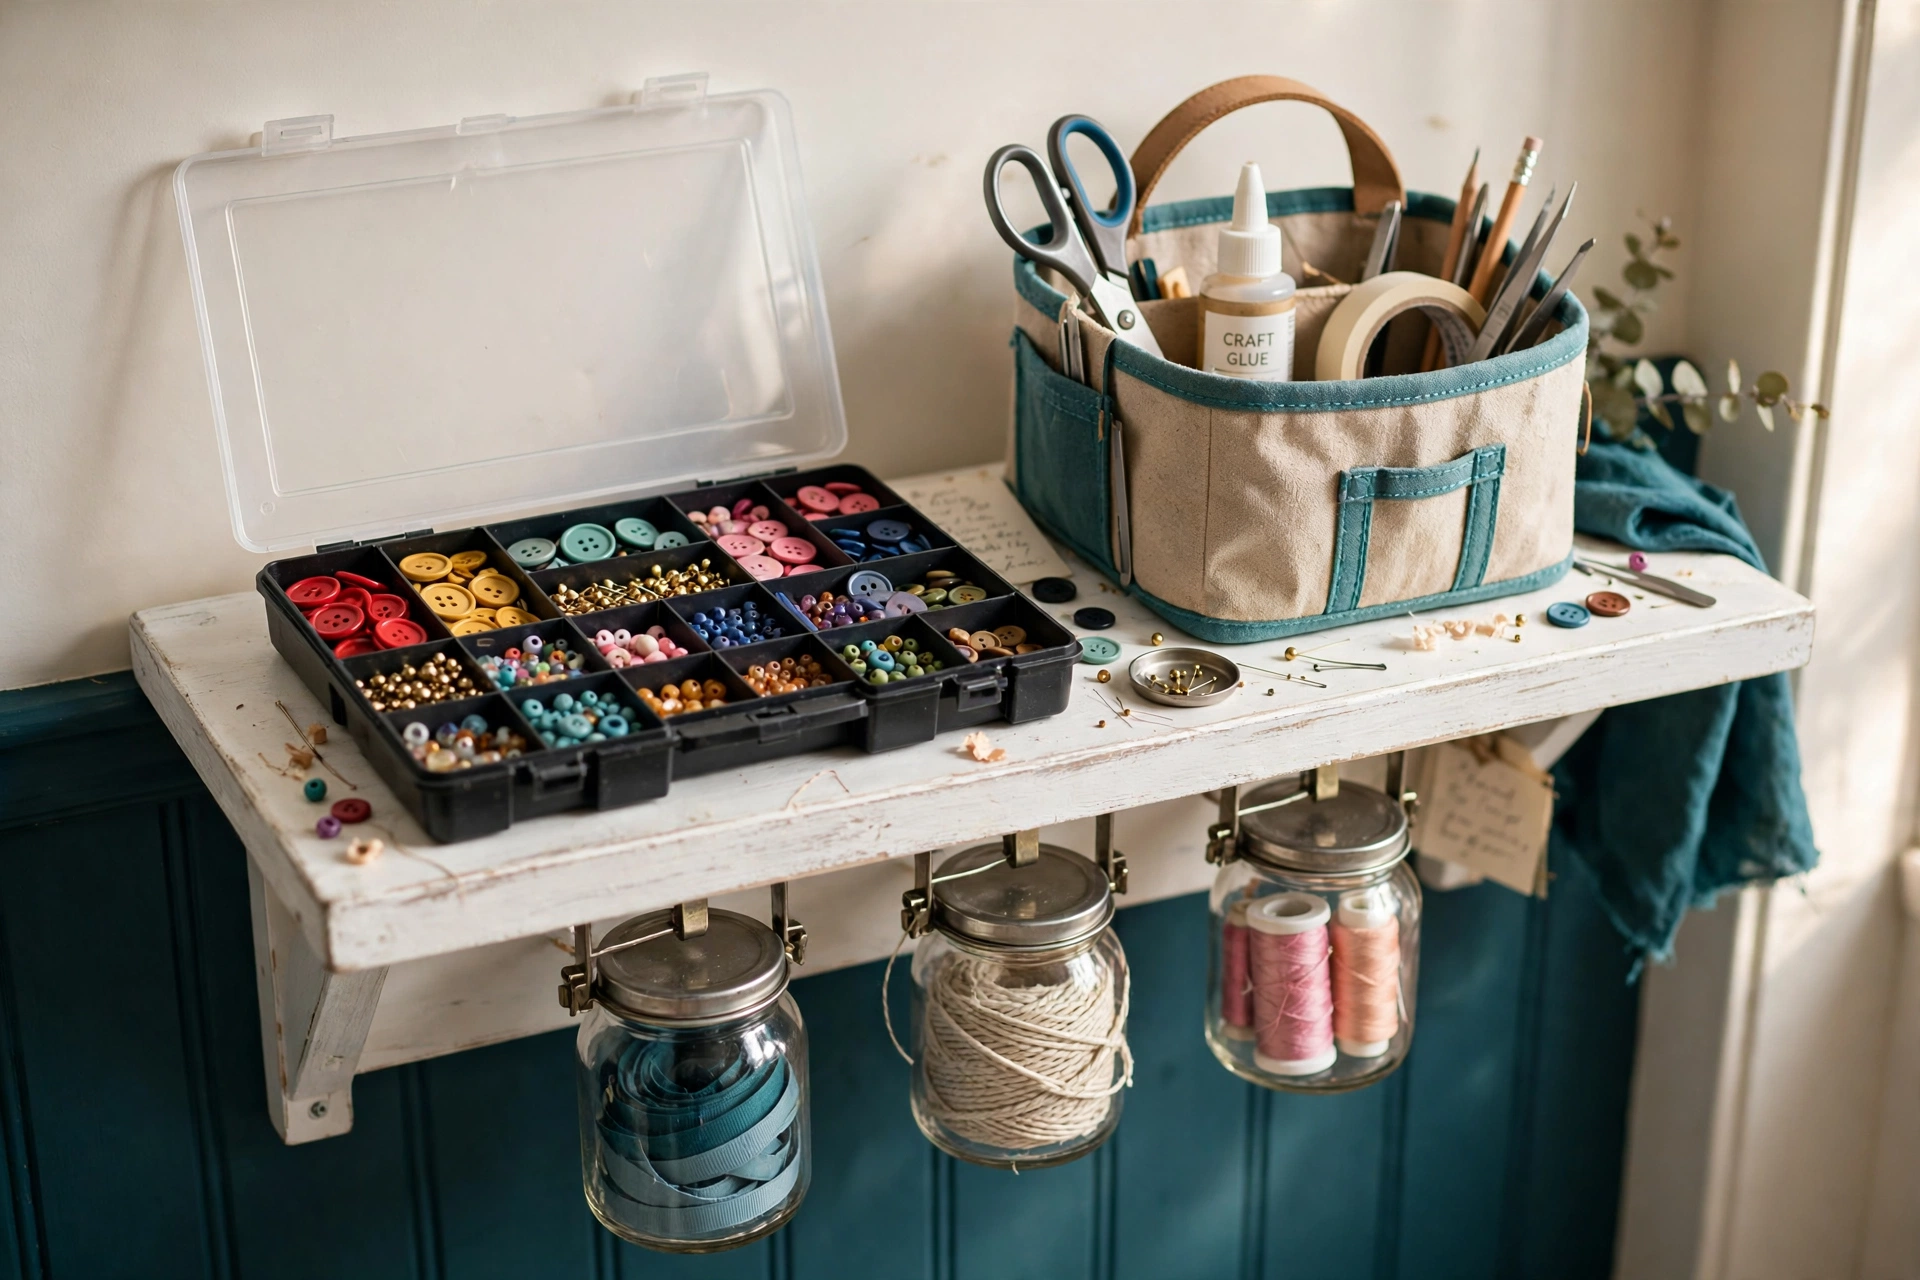
Buttons, brads, beads, eyelets, and jump rings turn any drawer into an archaeological dig. A tackle box, or any small-parts organizer with adjustable dividers, fixes that for a few dollars. One box per category, beads in one, findings in another, and the compartments keep everything separated and visible. Mount small jars under a shelf for instant grab storage too, lids screwed to the shelf underside, jars twisting on and off. Label every compartment by what is inside, not where it came from.
Best for: Jewelry makers, sewists, anyone with a hundred tiny pieces. Main advantage: You can find one bead without emptying a drawer. Watch out for: Cheap tackle boxes pop open when dropped. Keep them on a shelf, not on the floor where feet find them. Verdict: The cheapest idea here and one of the most satisfying. Deposit risk: 1/5.
8. Roll bulky supplies under the bed
Yarn, fabric, extra paper, and canvases are bulky, light, and rarely needed mid-project, which makes under-bed storage their natural home. A rolling under-bed bin keeps them dust-free and out of sight, and you only pull it out when you start a new project. Our under-bed storage ideas cover the bin sizes and the measure-first habit, and the craft version is simple: one bin per material, labeled on the end you can see. Keep the bin shallow, about 6 in tall, so it slides under most bed frames without a fight.
Best for: Bulk backstock and seasonal supplies. Main advantage: A whole shelf worth of storage that uses floor space you already paid for. Watch out for: Under-bed bins are where supplies go to be forgotten. Check the bin once a month or it becomes a stash, not storage. Verdict: Great for overflow, bad as your only system. Deposit risk: 1/5.
9. Claim a 3 by 3 ft corner and zone it
You do not need a room. You need a corner, and 3 by 3 ft, about 91 by 91 cm, is enough. Put the rolling cart in the corner, the pegboard on the wall above it, and a fold-down table at standard table height, about 30 in, on the wall beside it. A table 36 by 24 in folds flat against the wall when you are done and holds a sewing machine, a painting board, or a paper trimmer while you work. Define the corner with a small rug so it reads as its own zone. When you step into the corner, you are crafting, not tidying the apartment. Our room-by-room approach to organizing a whole home treats corners exactly like this, as rooms in miniature.
Best for: Anyone sharing a living room or dining room. Main advantage: A real work surface that vanishes when you are done. Watch out for: A fold-down table needs solid mounting, same as the pegboard. If you cannot drill, use a drop-leaf table on legs instead. Verdict: The idea that makes the other nine ideas work together. Deposit risk: 3/5 with a wall-mounted table, 1/5 with a freestanding one.
10. Run the 10-minute reset after every session
The system is not the bins. The system is the reset. When you finish crafting, set a timer for 10 minutes. Tools go back to the caddy, the project goes back to its Project Kit or the top tier of the cart, scraps go in the scrap file or the trash, and the table gets wiped. If the reset takes longer than 10 minutes, something in the system is wrong, usually a Mode Kit that grew past one box, or supplies with no home at all. Fix the home, not the timer. The one-in-one-out rule keeps the whole thing honest: a new container only arrives when an old one leaves.
Best for: Everyone, and especially anyone who has “organized” three times already. Main advantage: The corner is ready to use next time, so you actually craft more. Watch out for: Skipping the reset once is fine. Skipping it three times in a row is how a corner becomes a pile again. Verdict: The least exciting idea here and the one that matters most. Deposit risk: 1/5.
How to set up your craft corner in one weekend
Follow these seven steps in order. These craft supply storage ideas for small spaces come together in one weekend, the whole job takes about 2 to 3 hours, and you will craft in the new corner the same evening.
- Pick the corner. Choose a spot near a window for natural light, or beside a bookshelf you already own. Measure it. You need 3 by 3 ft of floor and one wall.
- Sort by work mode. Lay every supply on the table and sort into piles by how you create: paper, sewing, vinyl, painting. Not by brand, not by color. By work mode.
- Build the three kits. Fill the caddy with daily tools. Fill one clip box per work mode. Fill one box per active project. Everything left over is backstock.
- Hang the pegboard. Mount the 24 by 36 in board above the table height on furring strips into studs. Add hooks for daily tools only. Weekly tools stay in the clip boxes.
- Park the cart. Roll the 3-tier cart into the corner. Top tier is the active project, middle tier is daily tools, bottom tier is bulk. Leave one tier with breathing room.
- Fill the doors and gaps. Hang the over-door organizer on the closet door. Slide the under-bed bin under the bed. Put the tackle box on the shelf.
- Run the first 10-minute reset. Pack everything away, time it, and fix whatever took too long. If the reset runs past 10 minutes, something has no home yet. Give it one.
Mistakes to avoid
Buying bins before sorting. Bins bought for a stash you have not sorted yet always end up the wrong size. Sort first, measure what you actually own, then buy containers to fit.
Storing paper flat in deep bins. Deep bins hide paper and bend it. Paper goes vertical, always, in files or a sorter.
Hanging the pegboard on drywall alone. A loaded pegboard pulls out of drywall over time. Studs or proper anchors, or skip the pegboard and use a leaning shelf instead.
Letting the cart become storage. A cart with three full tiers is furniture, not a station. One tier stays light so the cart can actually roll to the table.
Forgetting paint and glue need upright storage. Paint tubes roll, glue leaks, and brushes bend. Store paint upright in a shallow tray, brushes bristles-up in a jar, and keep a rag and a jar of water permanently at the corner.
What to skip
A folding craft cabinet. It looks like a bookshelf and opens into a whole studio, and it costs several hundred dollars and weighs a ton. A $40 cart, a $15 pegboard, and a fold-down table do the same job in a rental for a tenth of the price.
Matching container sets. A full set of matching bins looks great in a photo and wastes money on sizes you do not need. Buy the sizes your sorted supplies actually require, even if they do not match.
Specialty craft furniture with one job. A ribbon rack that only holds ribbon, a paper tower that only holds paper. In a small space, every piece of furniture needs to earn its footprint twice over, or it does not come home.
Renter check: what your lease says first
Before you drill a single hole, read the lease. Most leases allow small nail and screw holes that you fill before move-out, but some ban wall mounting outright, and a few charge per hole at move-out. That is why the best craft supply storage ideas for small spaces for renters are the ones that need no screws at all. The pegboard and the fold-down table are the only ideas here that need screws, and both have no-drill swaps: a leaning ladder shelf instead of the pegboard, and a drop-leaf table on legs instead of the wall-mounted one. Everything else on this list, the cart, the caddy, the clip boxes, the over-door organizer, the tackle box, the under-bed bin, and the reset rule, needs no permission at all. Photograph the walls before you mount anything, keep the filler and the touch-up paint, and check the deposit rules in our renter-friendly guide before you start. A $15 pegboard is cheap. A $200 wall repair bill is not.
How do you store craft supplies when you don’t have a craft room?
Use portable storage you can bring to your work area and put away afterward. A 3-tier rolling cart, a handled caddy, and clear clip boxes let you craft at the dining table and pack everything into a 3 by 3 ft corner in about 10 minutes when you are done.
How do you organize a lot of craft supplies in a small space?
Go vertical instead of spreading out. A pegboard on the wall, an over-door organizer on the closet door, and shelves above the door hold more than a whole extra bookcase, and they use no floor space at all. Sort by work mode first, then give every mode one box.
Where can you store craft supplies in a small apartment?
Look for unused spaces first: a closet you can turn into a craft cabinet, the wall above your table, the back of a door, the space above a door, and under the bed for bulky backstock. Portable containers make it easy to keep supplies in one spot and carry them to the table when you are ready to work.
What is the cheapest way to start organizing craft supplies?
Start with the three-kit system using containers you already own, then buy the $90.49 starter kit: a handled caddy for $21, a 6-pack of clear clip boxes for $39.49, a pegboard sheet for $15, and a hook kit for $15. Add the $39.99 rolling cart later, once the system is working and you know you will use it.
How this was made
This post was researched from the top-ranking craft storage guides and priced from retailer listings checked in November 2026. The corner budget, the pegboard tool count, and the starter kit total are computed from published product dimensions and listed prices, not from a test or a project. No product was tested by the author.
Sources
The portable pantry method and three-kit system at CreateRoom; the 19-idea craft room guide at Budget Nest Studio; the 20-idea list at Hobby Hearth; the craft corner guide at The Tiny Nest Home; the small-space art supply guide at Nest Sorted; the no-craft-room FAQ at Public Storage; IKEA RASKOG pricing via The Daily Meal and Parade; pegboard pricing via Home Storage HQ; clip box and caddy pricing via StarterPacks.