Striped Ceiling Ideas for Small Rooms: 9 Patterns That Make a Low Ceiling Look Taller
Direct answer
Yes, striped ceiling ideas for small rooms work, but only when the stripe width fits the room. A 10 by 10 ft bedroom takes six 20 in stripes. A narrow 8 ft room takes four 24 in bands. Get the width wrong and the ceiling feels lower, not taller. I worked out the stripe-width math for every common room size, the exact paint quantities for a small ceiling, and a paint-route total of $67 to $86 as of November 2026. This guide gives you 9 patterns, each with a verdict, plus a renter-safe peel-and-stick route that comes off clean.
Which striped ceiling ideas for small rooms actually make a ceiling look taller?
Stripes change how your eye travels, and that is the whole trick. Bands that run toward the room’s focal point, the headboard, the dining table, the far window, pull your gaze along and the room reads longer. Bands that run across a narrow room make it read wider. Neither effect is magic. A 2004 study of the Helmholtz illusion found that line orientation changes how people judge the width of square figures, which explains why the trick works, but it does not promise that every striped ceiling makes every room feel bigger. Direction, width, contrast, ceiling height, and furniture placement all matter.
Here is the honest version. Wide, low-contrast bands are the most reliable way to add a sense of height in a small room. Narrow, high-contrast stripes are the riskiest. They can look sharp in a photo and busy from the sofa, because you see them from below at a sharp angle. If your ceiling is under 8 ft, keep the contrast soft and the bands wide. If the ceiling is 9 ft or higher, you can push the contrast further. And before you buy paint, tape the pattern out on the ceiling with painter’s tape and live with it for a day. Stand in the doorway. Sit where you actually sit. That one test tells you more than any photo.
If you want the full menu of ceiling treatments first, our guide to ceiling designs for small rooms covers tray, coffered, beadboard, and drop ceilings. Stripes are the paint-only cousin of those ideas. No construction, no new structure, just pattern.
How wide should ceiling stripes be in a small room?
Measure the ceiling width first, in several places, because older rooms are rarely square. Then divide that width into 4 to 8 bands. Fewer than 4 bands look like a mistake. More than 8 bands turn into visual noise from the floor. Each band should land between 15 and 24 in wide. Center the layout so the two edge bands match. Never leave a sliver under 6 in at the edge. A thin leftover strip is the single most common giveaway of a rushed job.
Here is the table I worked out for the room sizes you actually meet in a small home. Every row divides cleanly, so no edge sliver.
| Ceiling width | Stripe plan | Stripe width |
|---|---|---|
| 8 ft (96 in) | 4 stripes | 24 in (61 cm) each |
| 8 ft (96 in) | 6 stripes | 16 in (41 cm) each |
| 10 ft (120 in) | 5 stripes | 24 in (61 cm) each |
| 10 ft (120 in) | 6 stripes | 20 in (51 cm) each |
| 10 ft (120 in) | 8 stripes | 15 in (38 cm) each |
| 12 ft (144 in) | 6 stripes | 24 in (61 cm) each |
| 12 ft (144 in) | 8 stripes | 18 in (46 cm) each |
| 12 ft (144 in) | 9 stripes | 16 in (41 cm) each |
Two rules sit behind the table. First, odd counts work well when you want a stripe centered on the room, because the middle band lands dead center. Even counts work well when you want a boundary centered instead. Second, wider bands read better from the floor. A 24 in band is easy to read from 8 ft below. A 12 in band is not. When in doubt, go wider and use fewer stripes.
9 striped ceiling ideas for small rooms
Every idea below gets the same four lines. Best for tells you the room it suits. Main advantage tells you what it buys you. Watch out for tells you where it goes wrong. Verdict tells you whether I would pick it. The ideas run from the boldest to the gentlest, and the last one is the best place to start if you are nervous.
1. Classic cabana stripes
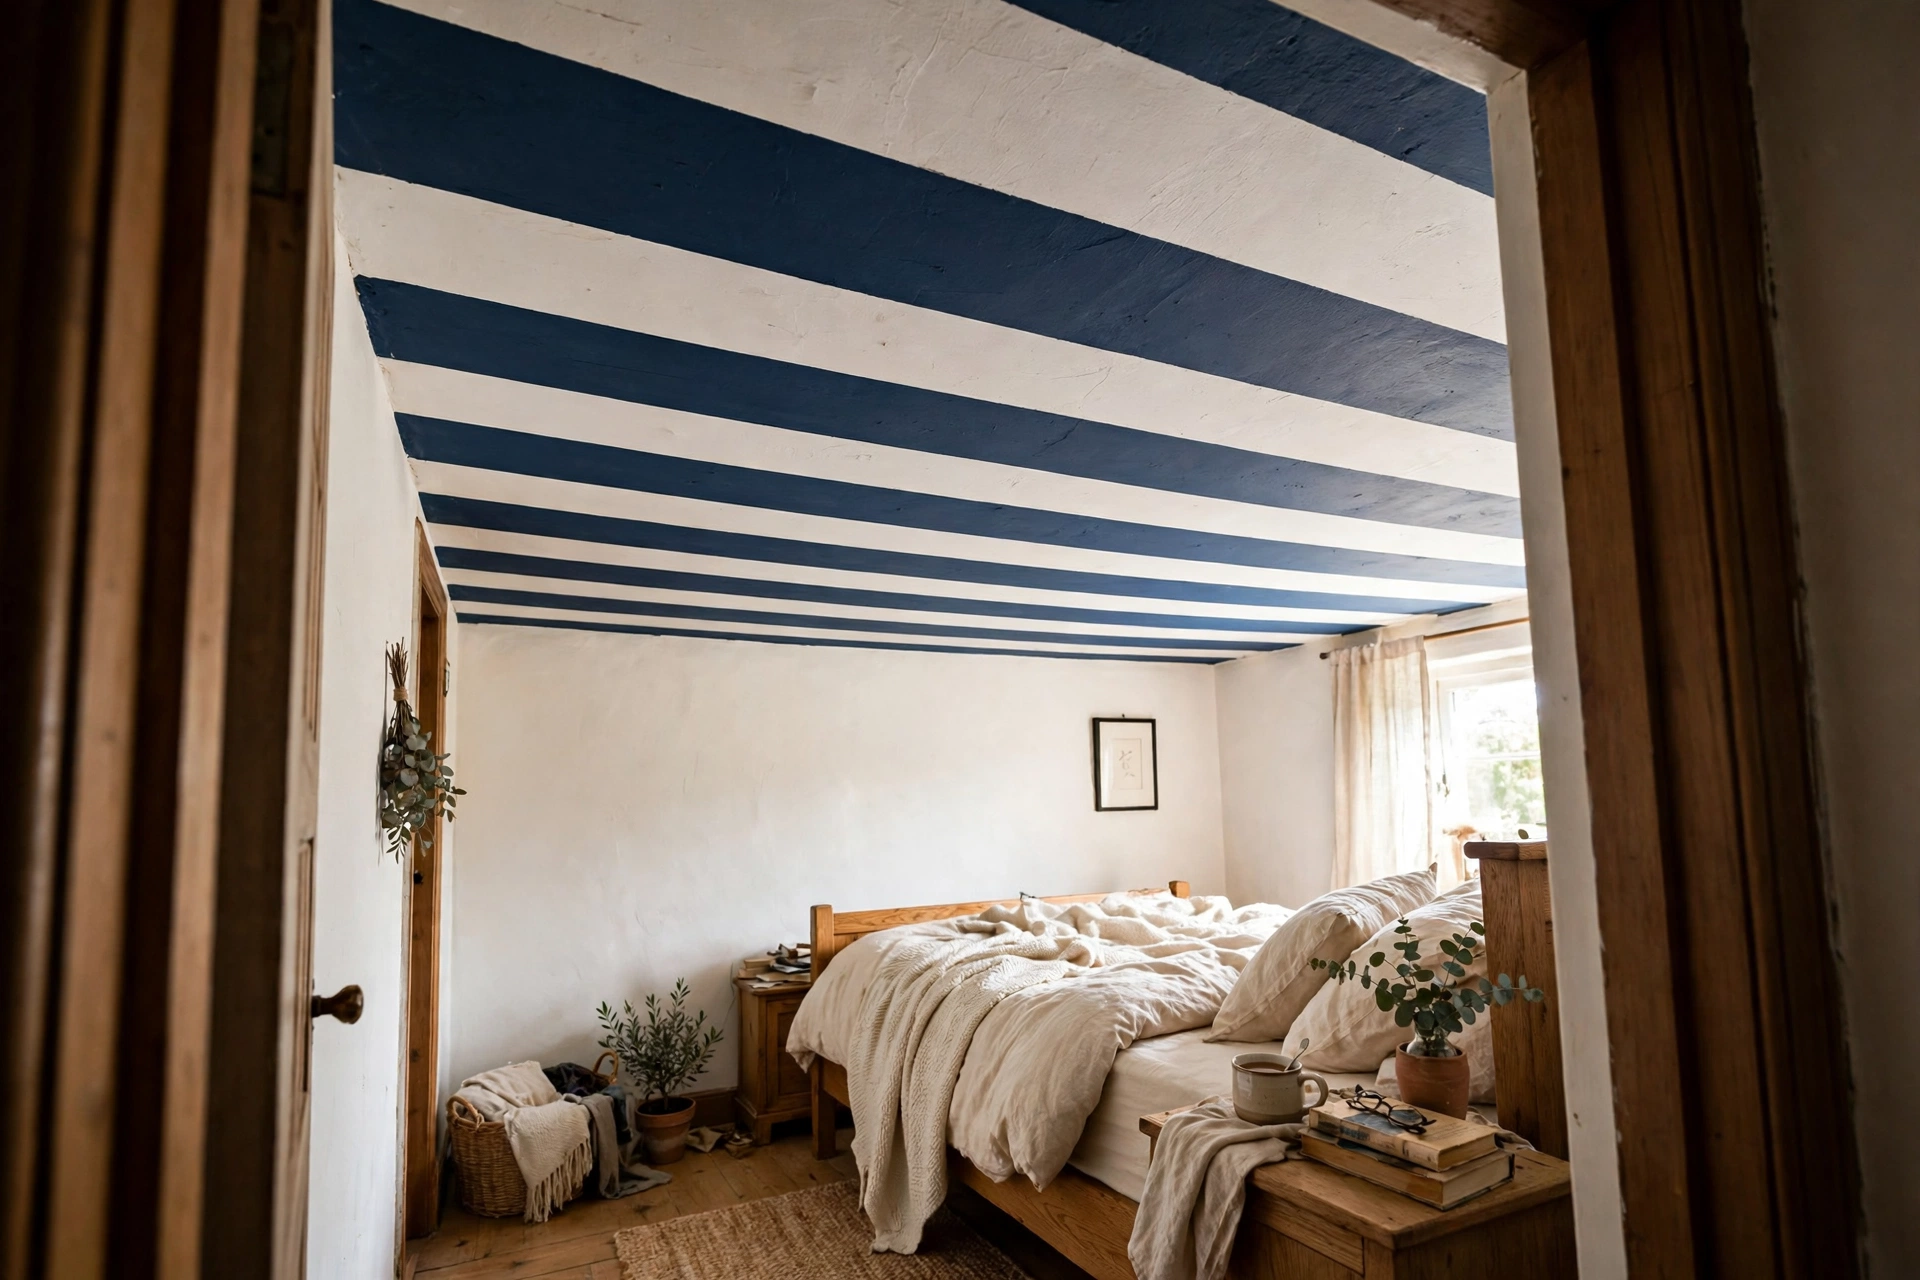
Wide alternating bands of white and one saturated color. Navy and white feels coastal. Terracotta and cream feels warm. Black and ivory feels sharp and editorial. This is the pattern most people picture when they hear “striped ceiling,” and it is the most copied for a reason. It reads clearly from the floor, it photographs well, and it needs no explanation.
Best for: bedrooms and dining rooms with 8 ft ceilings or higher.
Main advantage: the clearest, most readable pattern. One glance and the room has a point of view.
Watch out for: high contrast shows every wobble in the tape line. Use flat paint, not eggshell, so the finish hides small flaws.
Verdict: the safest bold choice. If you only try one striped ceiling, try this one.
2. Tone-on-tone wide stripes
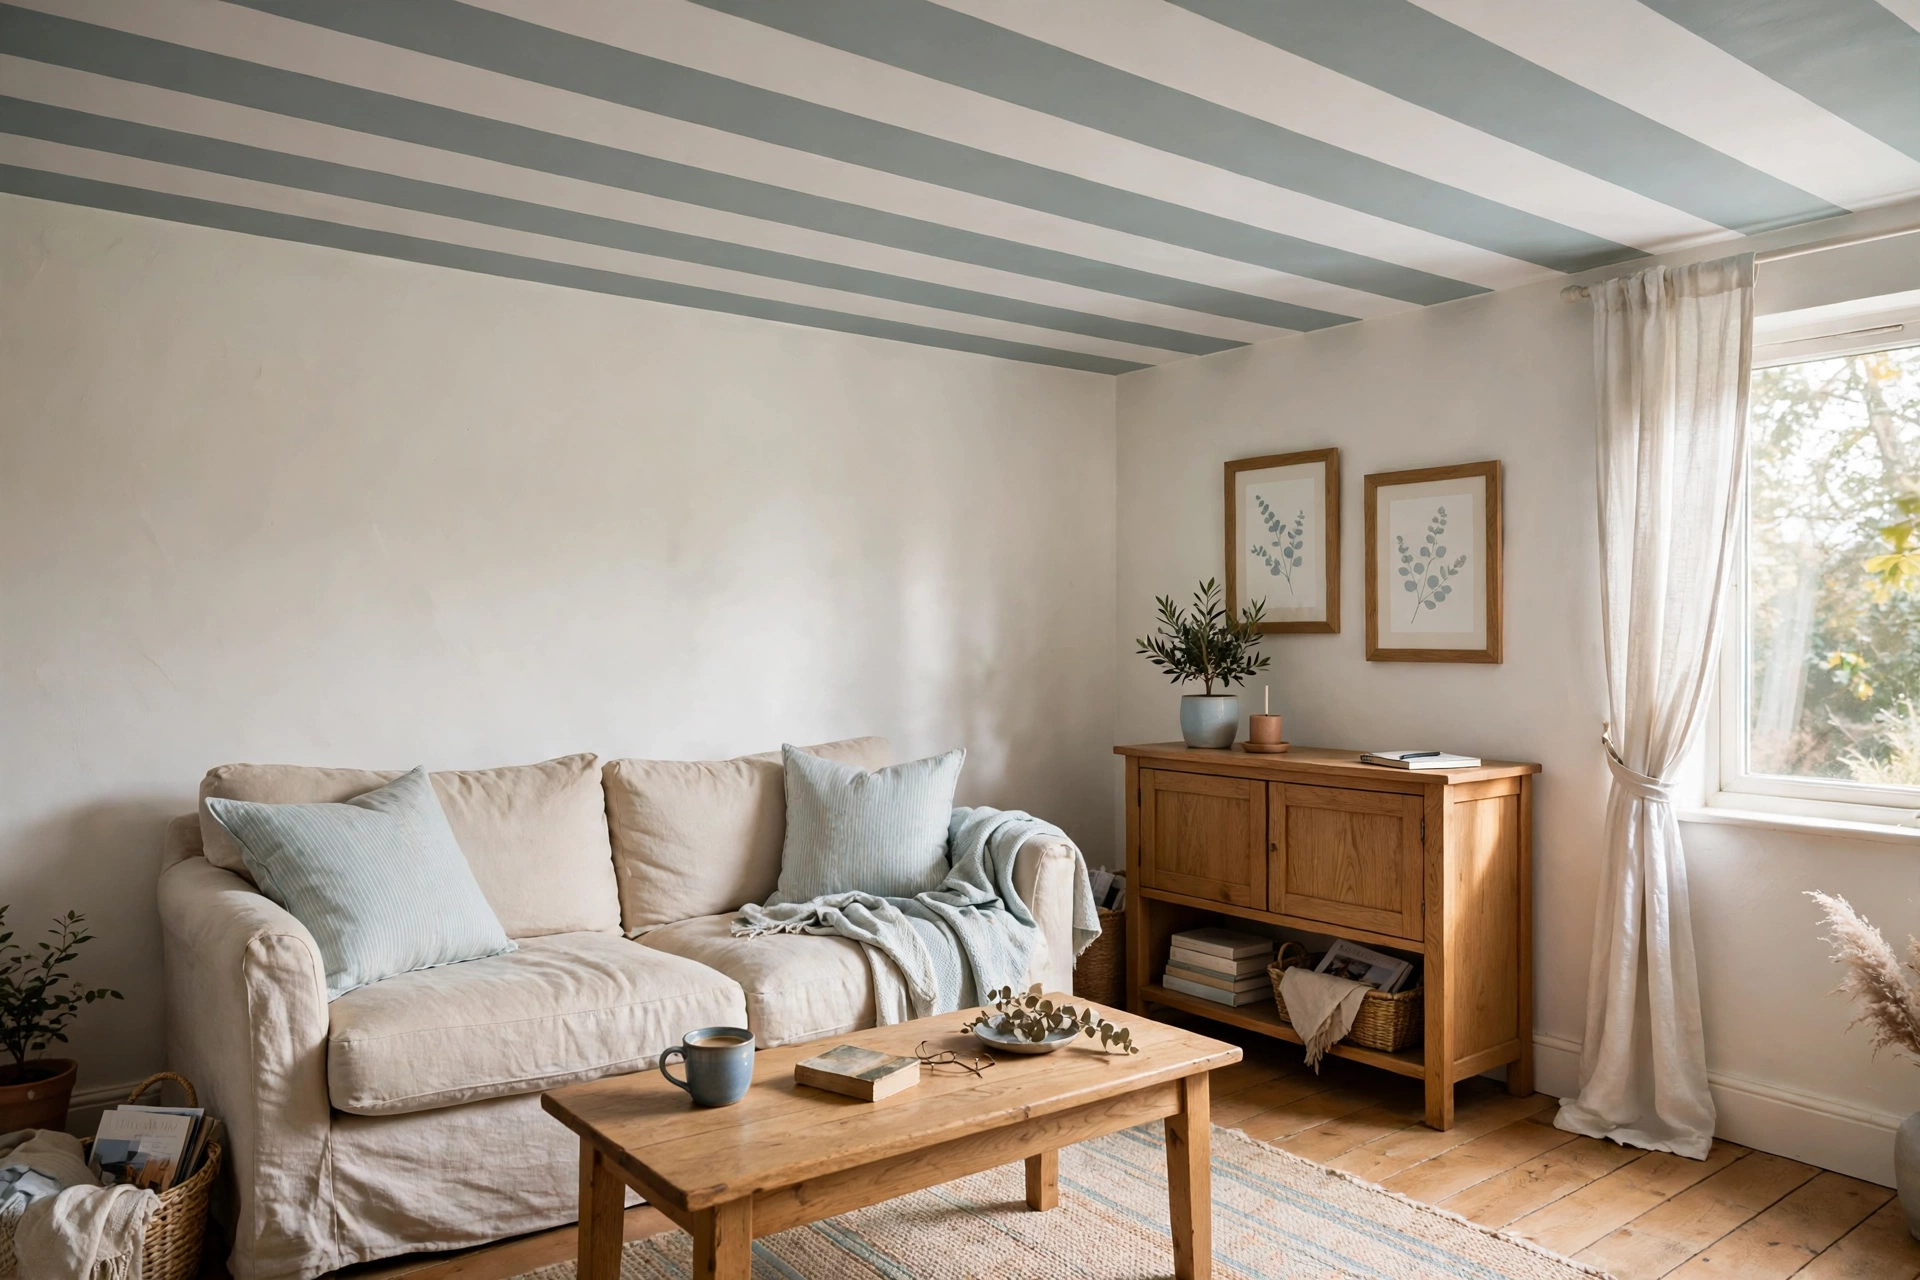
Two related shades instead of two opposites. Mushroom and warm white. Sage and pale eucalyptus. Dusty blue and soft gray. You can also alternate flat and eggshell versions of a similar shade, so the contrast appears as light moves across the ceiling. The pattern is there, but it whispers.
Best for: low ceilings under 8 ft, calm bedrooms, and rooms where you want height without drama.
Main advantage: the height illusion without visual noise. The room feels taller and nobody can quite say why.
Watch out for: sheen differences reveal every patch and roller mark. Patch, sand, and prime carefully before you start.
Verdict: the best choice for a genuinely low ceiling. Bold stripes fight a low ceiling. These work with it.
3. Framed border stripes
You do not need to stripe the whole ceiling. Two or three nested bands trace the perimeter, or frame the area above the bed or dining table, while the center stays calm. It reads like painted molding and needs about half the taping of a full ceiling. It also suits small rooms because the middle of the ceiling stays quiet.
Best for: small living rooms, rooms with a tray ceiling, and anyone short on patience.
Main advantage: half the work, most of the effect. The border frames the room instead of filling it.
Watch out for: the outer band must align with something below, a rug edge, the table, the bed. A floating border looks accidental.
Verdict: the smartest low-effort option. My pick if you want the look in one afternoon.
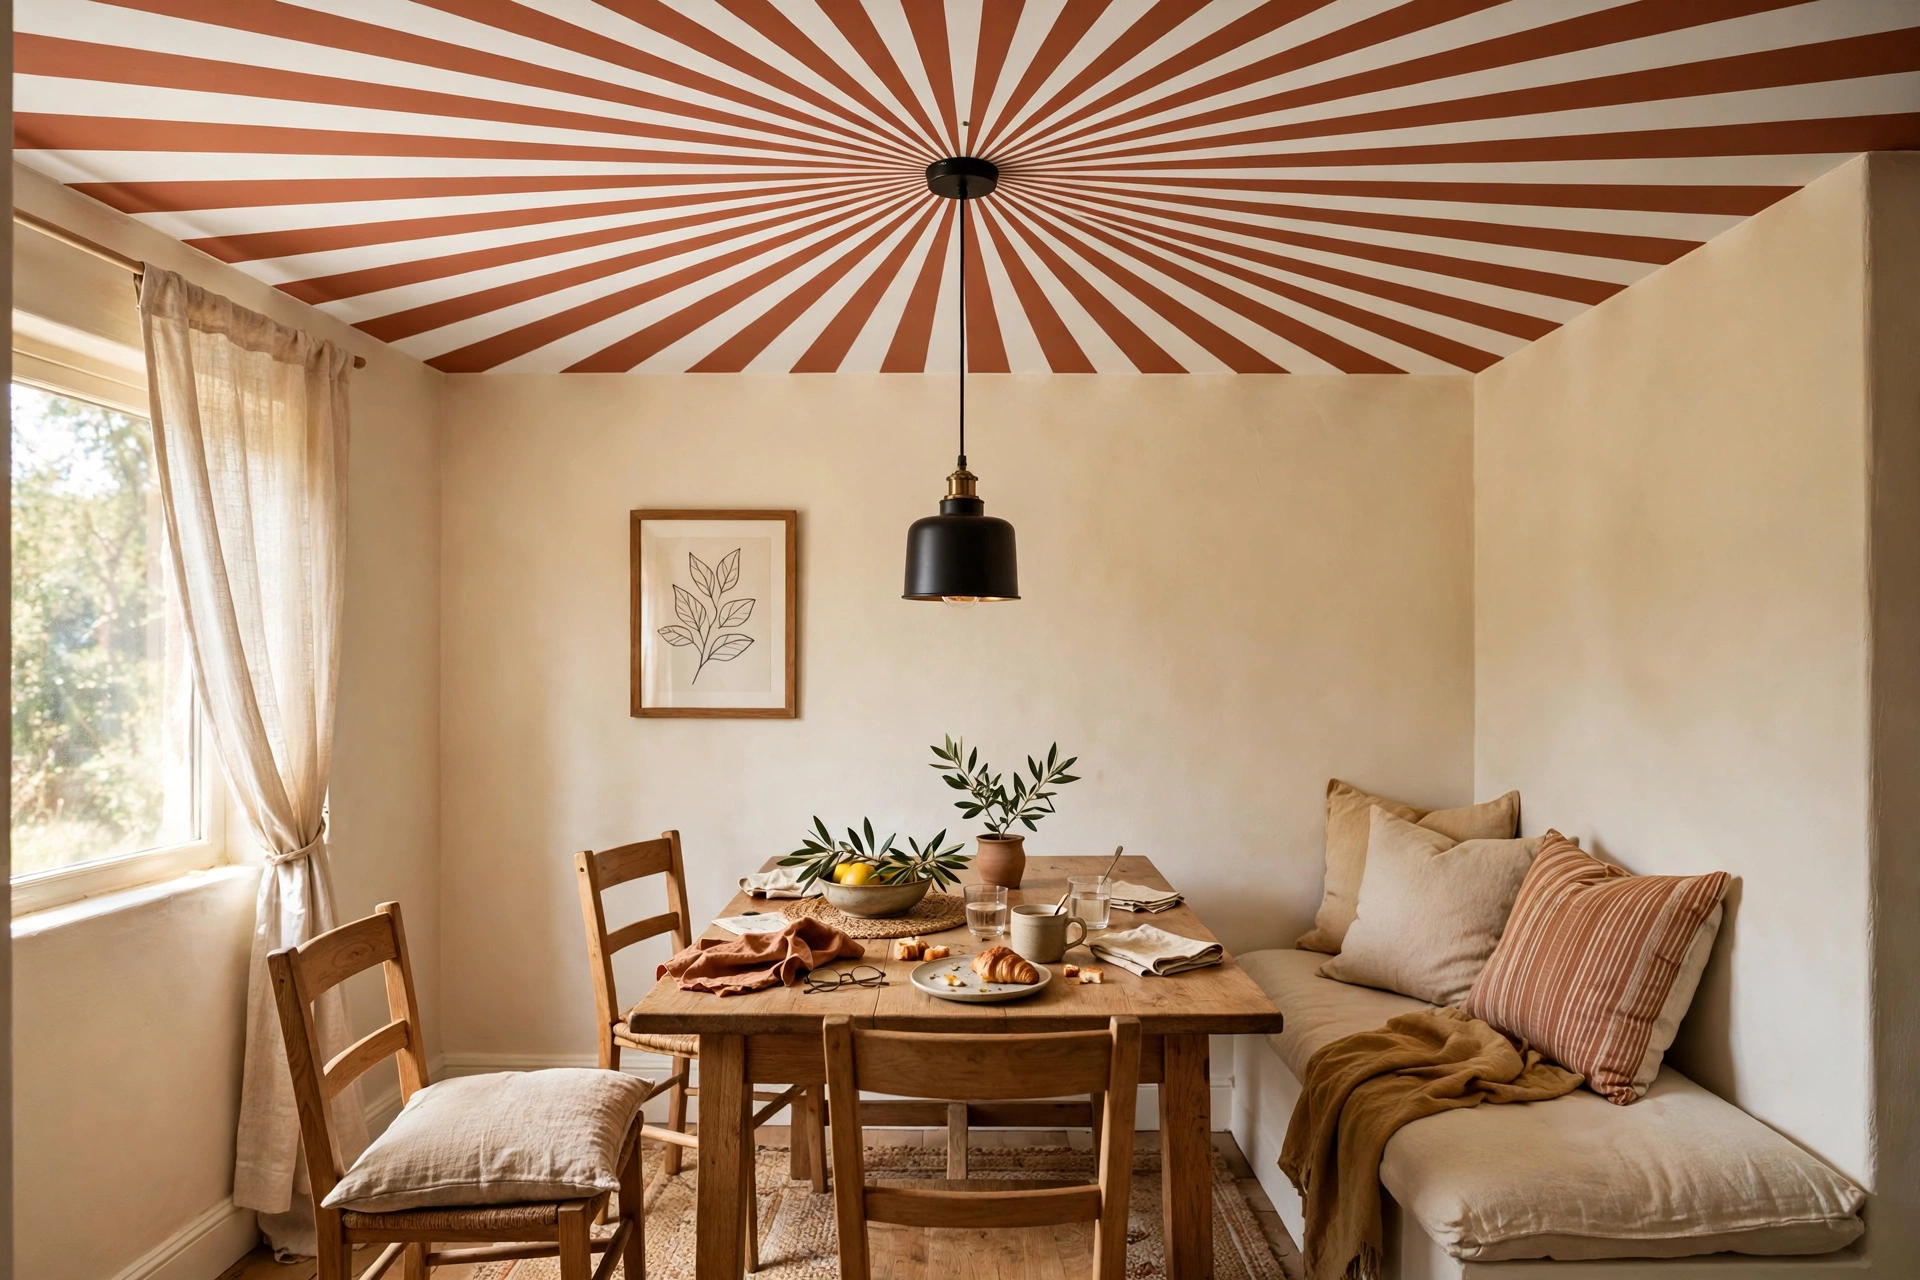
4. Sunburst stripes
Stripes radiate from a central pendant, ceiling rose, or fan canopy, like a circus tent or a rising sun. Black and white feels energetic. Ochre and cream feels softer. Terracotta and white feels warm and graphic. Small width differences near the edge matter less than crooked parallel bands, because the eye follows the rays, not the spacing.
Best for: dining nooks and attic bedrooms where the fixture sits near the center.
Main advantage: the highest drama per square foot. The light becomes the centerpiece of the room.
Watch out for: it only works if the fixture is near the visual center. An off-center fixture makes the whole pattern look wrong, so measure twice.
Verdict: the boldest idea here, and the easiest to place wrong. Center the fixture first, then commit.
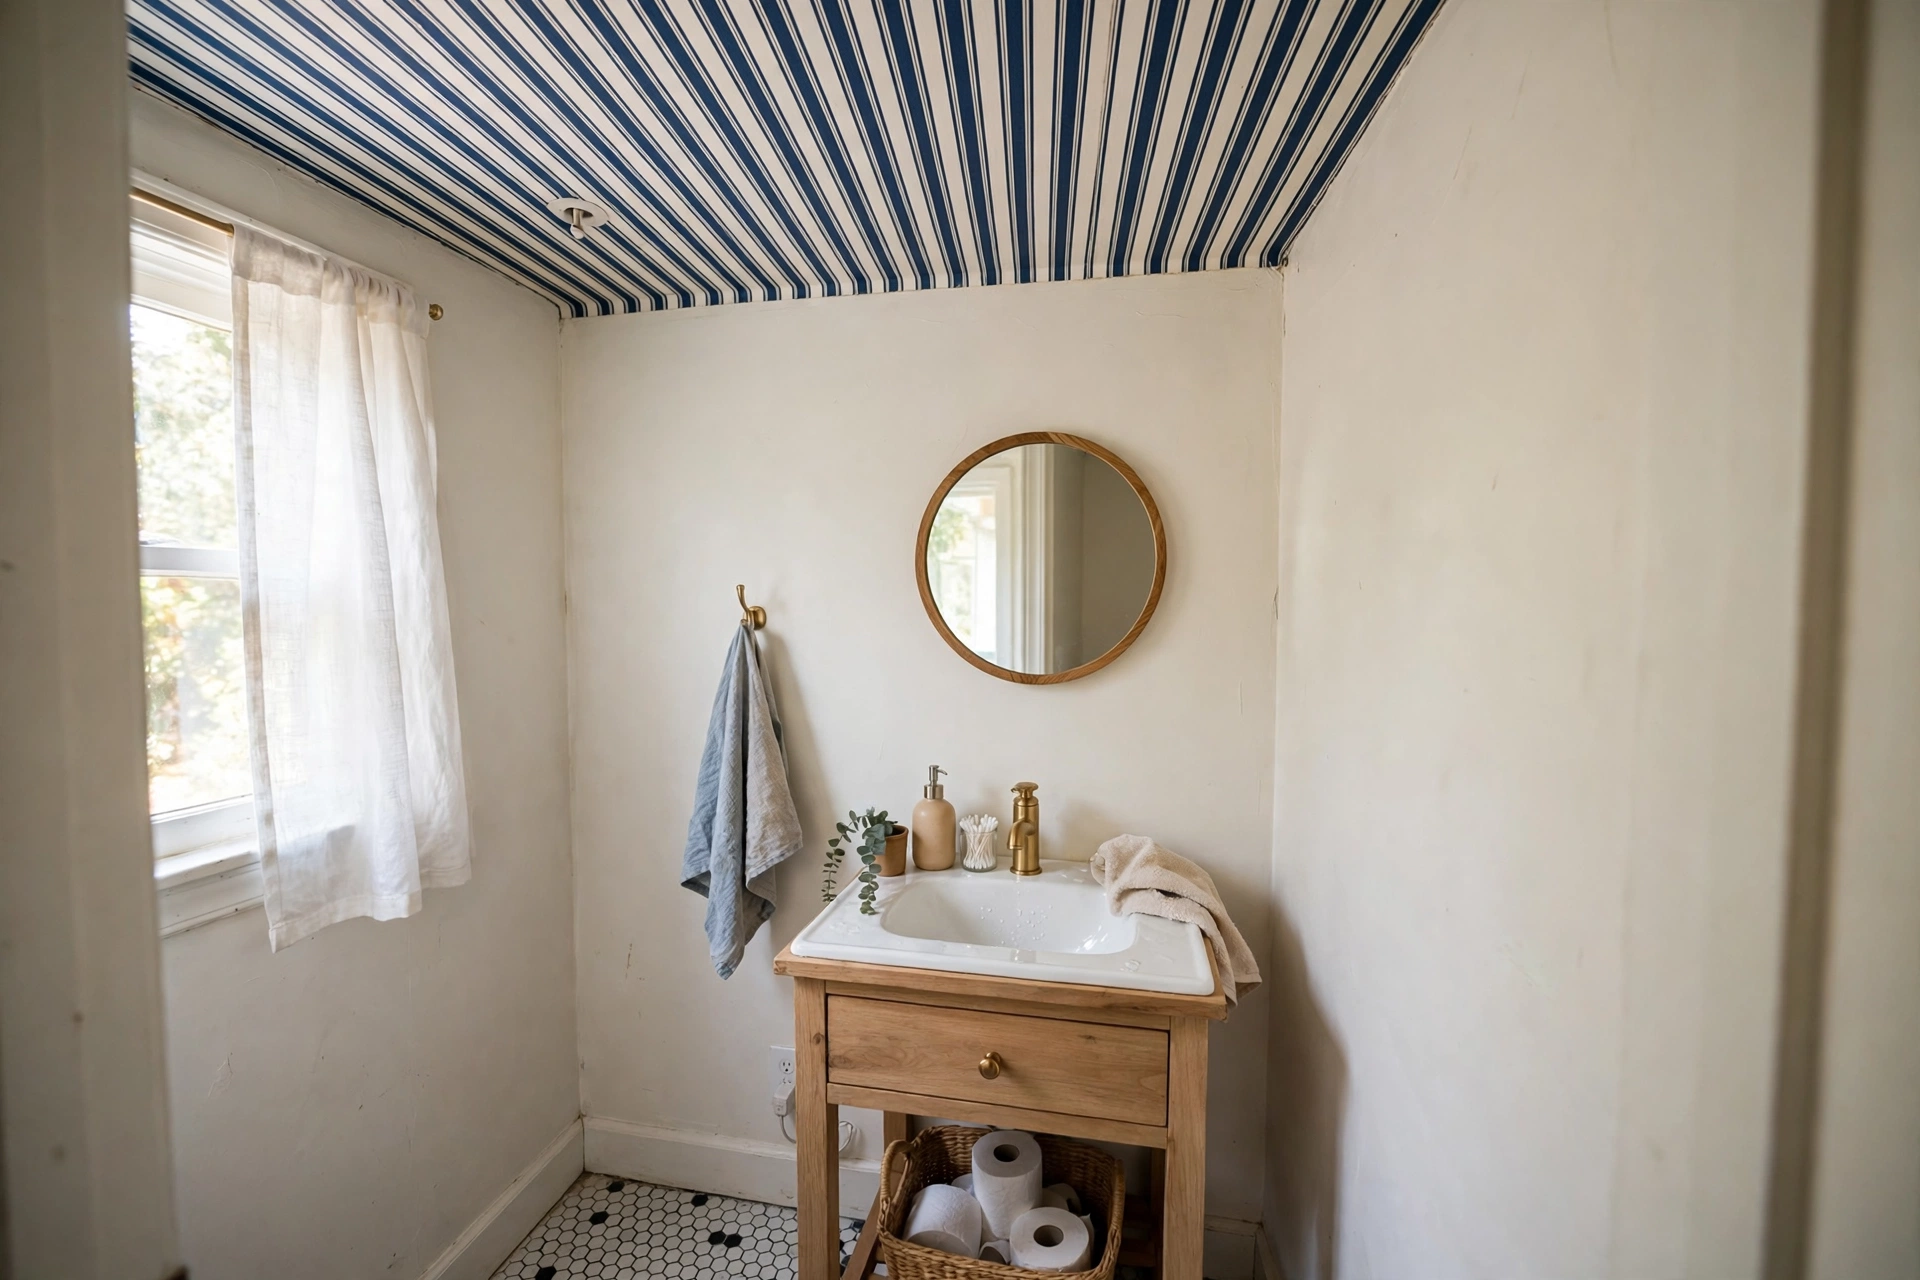
5. Peel-and-stick striped wallpaper
Crisp factory stripes, no paint, no drying time, and it peels off when you move. A standard RoomMates roll measures 20.5 in wide by 18 ft long and covers about 30.8 sq ft. It suits fine ticking stripes and hand-drawn bands that would be tedious to paint. Test a sample first. Adhesion varies with finish, texture, and humidity, and gravity makes ceiling installation less forgiving than a wall.
Best for: renters, powder rooms, and first-timers who want a reversible test.
Main advantage: the only truly reversible option. No paint, no primer, no repainting at move-out.
Watch out for: it needs smooth, clean, cured paint. Textured, dusty, damp, or chalky ceilings reject it. Order samples, because colors look darker overhead.
Verdict: the renter route, full stop. Deposit risk 1 out of 5, the lowest of any idea here.
6. Thin pinstripes
Narrow 2 to 4 in lines in a low-contrast pair, like charcoal and cream, or soft gray and white. The rhythm is subtle, almost like texture. It suits traditional rooms and hallways, and it is forgiving to paint, because a slightly wobbly thin line reads as handmade rather than wrong.
Best for: hallways, home offices, and traditional bedrooms.
Main advantage: quiet rhythm that adds polish without shouting.
Watch out for: too many thin lines read as busy from the floor. Keep the count low and the contrast soft, or the ceiling starts to vibrate.
Verdict: good when you want texture, not a statement. Overrated for low ceilings, where wider bands do more work.
7. Stripes that wrap onto the wall
The bands continue 12 to 18 in down the wall from the ceiling, so the ceiling and the upper wall read as one tent-like canopy. It works best on the headboard wall in a bedroom or behind the dining table. The wrap makes a small room feel intentional and cocooned rather than just painted.
Best for: bedrooms with a headboard wall and dining rooms with a clear focal wall.
Main advantage: the most immersive effect here. The room feels designed from every angle.
Watch out for: the wrap line must be level all the way around, and corners are fiddly. A laser level earns its keep on this one.
Verdict: the hardest to get right, and the most rewarding when it lands. Not a first project.
8. One bold feature band
A single wide stripe, 24 to 36 in across, running over the bed or the dining table, like a rug on the ceiling. The rest of the ceiling stays plain white. It defines a zone without painting the whole ceiling, and it takes about an hour of actual painting.
Best for: small bedrooms, studio sleep zones, and anyone testing the look before committing.
Main advantage: the fastest way to test stripes. One band, one afternoon, one decision.
Watch out for: the band must center on the furniture, not on the room. A band centered on the room but off-center over the bed looks like a mistake.
Verdict: start here if you are unsure. If you love the band, extend it into a full ceiling later.
9. Stripes in the smallest rooms
Powder rooms, entries, closets, and nurseries under 50 sq ft are where bold ceilings shine. The limited area contains the pattern, so a dramatic choice feels intentional instead of overwhelming. A powder room takes one roll of wallpaper or a single afternoon of paint, and it is the room guests actually remember.
Best for: powder rooms, entries, closets, and nurseries.
Main advantage: maximum impact for minimum paint. A small ceiling forgives a bold choice.
Watch out for: dark colors in a windowless room need good lighting, or the room feels like a cave. Keep the walls light and add a bright bulb.
Verdict: the best first striped ceiling. Small room, small risk, big payoff.
How much paint does a striped ceiling need?
Pick the colors before you buy the paint. Repeat a color that already lives in the room, a rug, the curtains, the bedding, so the ceiling feels connected instead of random. If you have not picked a wall color yet, start with the best wall colors for small rooms and build the ceiling palette from there. And if the room faces north, the light runs cool and gray all day, so warm accents work harder. Our guide to paint colors for north-facing rooms explains the undertone logic in plain terms.
Now the math. A ceiling is length times width. A 10 by 10 ft bedroom ceiling is 100 sq ft. Two coats of the base color cover 200 sq ft. One gallon of ceiling paint covers 250 to 400 sq ft, per Behr’s own spec, so one gallon of base paint covers a small ceiling with room to spare. The accent stripes cover about half the ceiling, so 50 sq ft times two coats is 100 sq ft. One gallon of accent paint covers that easily, with plenty left for touch-ups. A 12 by 12 ft ceiling is 144 sq ft, or 288 sq ft for two base coats, still inside one gallon at the top of the coverage range. Only a heavily textured ceiling drinks enough paint to need a second gallon of base.
Tape math matters too. Six stripes on a 10 ft ceiling means five boundaries at 10 ft each, plus about 40 ft around the perimeter. That is 90 ft of tape. One 60 yd roll is 180 ft, so a single roll covers the job with tape to spare.
So what do striped ceiling ideas for small rooms cost in real money? Prices checked in November 2026 at US stores. The paint route is the cheap one. The wallpaper route costs more but needs no paint at all.
| Item | What to buy | Price as of November 2026 |
|---|---|---|
| Base ceiling paint, 1 gal | BEHR Premium Plus flat, white | $30 to $38 |
| Accent paint, 1 gal | Same line, tinted to your stripe color | $30 to $38 |
| Painter’s tape, 1 roll | FrogTape Multi-Surface, 0.94 in by 60 yd | $7 to $10 |
| Paint route total | Paint plus tape | $67 to $86 |
| Peel-and-stick route, 4 rolls | Striped wallpaper, 20.5 in by 18 ft rolls, for a 10 by 10 ft ceiling | $120 to $240 |
| Roller, tray and brush set | 9-in roller, tray, 2.5-in angled brush, only if you own none | $25 to $50 |
| Paint route with new tools | Everything above | $92 to $136 |
Time is the other cost. A 10 by 10 ft ceiling takes about 4 to 6 hours across a weekend. Measure and mark takes an hour. The base coat takes an hour plus drying time. Taping takes an hour. The stripe coats take 1 to 2 hours. Most of the job is waiting for paint to dry, not painting.
How to paint stripes on a ceiling in 7 steps
What you need
One gallon of base ceiling paint in flat, one gallon of accent paint, one roll of FrogTape 0.94 in by 60 yd, a 9-in roller frame with covers, a 2.5-in angled brush, an extension pole, a chalk line, a drop cloth, and a step ladder. Label the stripe sections with small tape tabs as you go, so you never lose track of which band gets the accent color.
The steps
- Measure and mark. Measure the ceiling width in several places. Divide it by your stripe count from the table above. Mark both ends of every boundary, then connect them with a chalk line. Label each accent section with a tape tab.
- Prep the ceiling. Remove dust, fill cracks, sand the repairs, and wipe the surface clean. A stripe job shows every flaw the base coat hides, so prep is not optional.
- Paint the base coat. Roll the lighter color over the whole ceiling in two light coats. Let it dry fully, then let it cure. Tape sticks badly to paint that is only dry to the touch, so give it the full time on the can.
- Tape the boundaries. Run painter’s tape along every marked boundary and press the edges firmly with a putty knife or a credit card. Tape the accent side of each line, so the stripe edge stays crisp.
- Seal the tape edges. Brush a thin coat of the base color over each tape edge and let it dry. Any seepage under the tape now matches the background, which is the trick that makes the lines look professional.
- Roll the stripe color. Roll the accent color over the marked sections in light coats, two if the color is deep. Work in the same direction as the stripes so lap marks run with the pattern, not across it.
- Pull the tape while the paint is wet. Remove the tape while the final coat is still slightly wet, pulling it back at an angle. Touch up any ragged edge with the small angled brush after everything dries.
Mistakes to avoid
Taping on uncured paint. Fresh paint feels dry long before it is cured. Tape pulls it straight off. Wait the full cure time on the can, usually 24 hours, before you tape.
Skipping the base-coat dry time between coats. Two rushed coats look worse than one patient one. Roller marks and lap lines show up under stripes more than on a plain ceiling.
Leaving an edge sliver. A 2 in leftover strip at the wall ruins the whole job. Center the layout from the start, and adjust the stripe width by an inch or two so the edges match.
Painting against the light. Lap marks show when you roll across the main light source. Roll with the stripes and with the light, and the seams disappear.
Using eggshell or satin on a bumpy ceiling. Shiny paint shows every patch, roller mark, and uneven spot. Flat paint is the safest default for a striped ceiling. Save the sheen contrast trick for a ceiling you know is smooth.
Forgetting the fixture. A sunburst centered on a pendant that sits 2 ft off-center looks wrong from every seat. Plan the pattern around the fixture before you mark anything.
What to skip
Narrow high-contrast stripes in a low room. Twelve thin black and white bands on a 7 ft 6 in ceiling feel like a cage. Wide, soft bands do the height job better.
Striped wallpaper on a textured ceiling. It will not stick, and it will peel at the worst moment. Paint is the only option on popcorn or heavy orange-peel texture.
A whole ceiling in dark navy in a windowless room. One dark band is drama. A whole dark ceiling with no window is a cave. Keep the base white and let one stripe carry the color.
A laser level for one small ceiling. A chalk line, a tape measure, and a patient hour do the same job for a single room. Save the laser for a whole-house project.
Can renters do a striped ceiling?
Yes, and the peel-and-stick route is made for you. Check the lease first, before you buy anything. Most leases allow removable decor but treat painting as an alteration that needs written permission. Get the permission in writing if you paint, and photograph the ceiling before and after so the move-out inspection has a record. If the lease is silent, ask the landlord in writing anyway. A short email now saves a deposit argument later.
Deposit risk by method, on a 1 to 5 scale where 5 means the deposit is most at risk: peel-and-stick striped wallpaper scores 1 out of 5, because it peels off and leaves the original paint alone. One bold painted feature band scores 3 out of 5, because you must repaint it white at move-out and match the original finish. A full painted striped ceiling scores 4 out of 5, because a full repaint takes time and a mismatched white is easy to spot.
Reversal is simple either way. Peel the wallpaper slowly, warming it with a hair dryer on low heat if it resists. For paint, roll two coats of the original white over the stripes and let each coat dry fully. If you are unsure whether peel-and-stick is safe on your walls, read our guide on whether peel-and-stick wallpaper damages walls first. It covers the same adhesive question for the ceiling.

Do striped ceilings make a room look bigger?
They can influence how your eye travels, but the result is not guaranteed. Direction, width, contrast, ceiling height, and furniture placement all matter. Broad, low-contrast bands are the most reliable. Test the layout with tape from the doorway and your main seating position before you commit.
What stripe width works best on a ceiling?
Wide stripes are easier to read from floor level and need fewer taped boundaries. In most small rooms, 4 to 8 bands create a strong pattern without feeling frantic. Aim for 15 to 24 in per band, center the layout, and never leave a sliver under 6 in at the edge.
Can peel-and-stick wallpaper go on a ceiling?
Sometimes, when the product and surface suit each other. Smooth, clean, cured paint is a better base than dusty, textured, damp, or chalky finishes. Test a sample for the recommended period first. Traditional wallpaper with the specified primer and adhesive may be more dependable on a difficult ceiling.
Is a bold striped ceiling suitable for a small room?
Yes. A powder room, closet, nursery, or entry can suit a dramatic ceiling because the limited area contains the pattern. Use fewer, broader bands or a framed border if full contrast feels overwhelming. Keep the walls and furnishings restrained so the ceiling has room to breathe.
How this was made
This guide was researched from the top-ranking striped ceiling guides, with stripe widths and paint quantities computed from room dimensions and manufacturer coverage specs, and prices checked at US stores in November 2026.
Sources
Stripe methods, taping technique, and the lead-safe note for homes built before 1978: DecorMingle’s striped ceiling guide. Inspiration gallery of 20 striped ceilings: The Creative Hour.