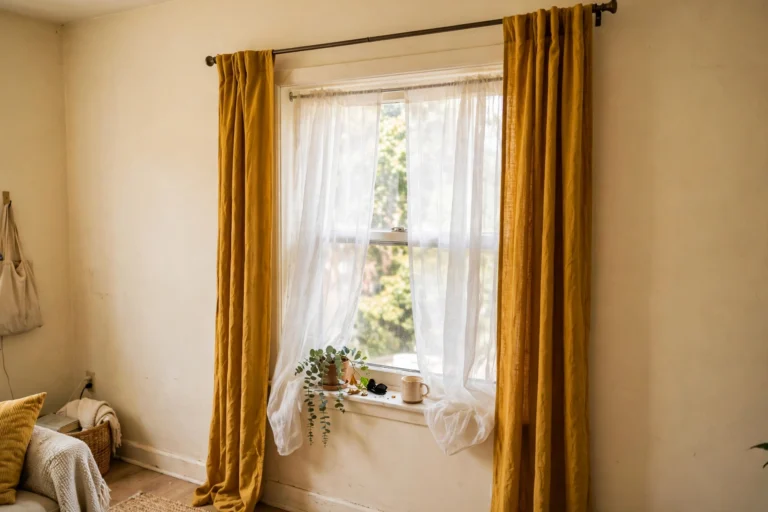

How to Draft Proof a Rental Apartment: 7 Removable Fixes That Actually Work
You can feel it the second you sit down. The sofa is warm, the blanket is on, and still a thin stream of cold air is sliding across the floor toward your ankles. That is a draft, and in a rental it usually comes through gaps you can seal in one afternoon without drilling a single hole. Here is how to draft proof a rental apartment without risking your deposit: find the leaks first, measure the gaps, then seal the worst ones with removable products. A standard 36 inch (91 cm) door with a 3/4 inch (19 mm) gap underneath it leaves a 27 square inch hole in your wall, about 0.19 square feet of open space. Add a 1/8 inch (3 mm) gap all the way around the same door frame and that is another 24.5 square inches. No wonder the room never warms up. The seven fixes below cost $22.92 for a starter kit and $60.86 for a whole small apartment, prices checked in November 2026, and every one of them peels off or lifts away at move-out. In the UK this job is spelled draught proofing. Same work, same products, different spelling.
How to draft proof a rental apartment: find the draft first
Do not buy anything yet. Spend 20 minutes hunting first, because sealing the wrong gap wastes money and the real leak keeps blowing. Pick a cold, windy day, close every window and exterior door, and turn the heating off for 10 minutes so the air settles. Then work room by room with three tests.
The candle test. Hold a lit candle or a stick of incense near the window frames, door frames, skirting boards, outlets on outside walls, and where the floor meets the wall. A flickering flame or drifting smoke marks a leak. Mark each spot with a strip of masking tape. Keep the flame away from curtains, and blow it out before you move to the next room.
The hand test. Wet the back of your hand and run it slowly around the same frames. Cold spots jump out at you. It is less precise than the candle, but it is fast and safe, and it works well on door bottoms where a flame is awkward.
The paper test. Close a sheet of paper in the door or window and try to pull it out. If it slides out easily, the seal is weak there. If it holds firm, that edge is fine. This test is also how you measure gap size: stack sheets of paper until they just fill the gap, then measure the stack. A standard sheet is about 0.1 mm thick, so 30 sheets is roughly 1/8 inch (3 mm).
Most apartments have the same three culprits. The gap under the front door is usually the biggest single leak. The window frames come next, especially the meeting rail on sliding windows where the two sashes overlap. The small stuff, outlets on outside walls and gaps where skirting meets the floor, adds up last. Fix them in that order and you will feel the difference on the first cold evening.

How big is the hole? Do the gap math before you buy
Every draft product is sized to a gap width, and buying the wrong thickness is the most common waste of money in this job. Measure first, then match the product to the gap with this table.
| Gap width | What it means | What to buy |
|---|---|---|
| Under 1/8 in (under 3 mm) | Hairline, you feel it more than see it | V-strip or thin foam tape |
| 1/8 to 1/4 in (3 to 6 mm) | The usual window frame gap | Foam weatherstrip tape, 3/8 in |
| 1/4 to 1/2 in (6 to 13 mm) | A clear, visible gap | Rope caulk or thick foam tape |
| 1/2 to 1 in (13 to 25 mm) | A real hole under a door | Twin foam stopper or draft snake |
| Over 1 in (over 25 mm) | Something is warped or missing | Landlord job, do not fill it yourself |
The math is what makes this worth doing. That 36 inch door with a 3/4 inch gap underneath is 27 square inches of open hole, about the size of a small paperback book. The utility Avista puts it another way: a gap of just 1/8 inch around a door or window is the equivalent of having a softball-sized hole in the wall. You are not sealing a crack. You are closing a hole you could fit your hand through. The Energy Saving Trust estimates that draught proofing windows, floors and doors saves around 55 pounds a year in Great Britain, and sealing an unused chimney saves around 45 pounds a year. In a small apartment the saving is smaller, but the comfort change is immediate, and a 23 dollar starter kit pays for itself in weeks in a cold climate.
Fix 1: Slide-on twin foam under-door draft stopper
Best for: the gap under the front door or any exterior door, the single biggest leak in most rentals.
Main advantage: it slides onto the bottom of the door like a snug sleeve, so there is no glue, no screws, and nothing stuck to the paint.
Watch out for: it only works on doors 1 to 1.7 inches (25 to 43 mm) thick, so measure your door edge first. If your door barely closes already or rubs the floor, skip anything bulky and seal the sides first.
Verdict: start here. It takes 30 seconds, it blocks the cold stream at ankle level, and move-out is just pulling it off.
Deposit risk: 1 out of 5. Nothing touches the paint or the floor.
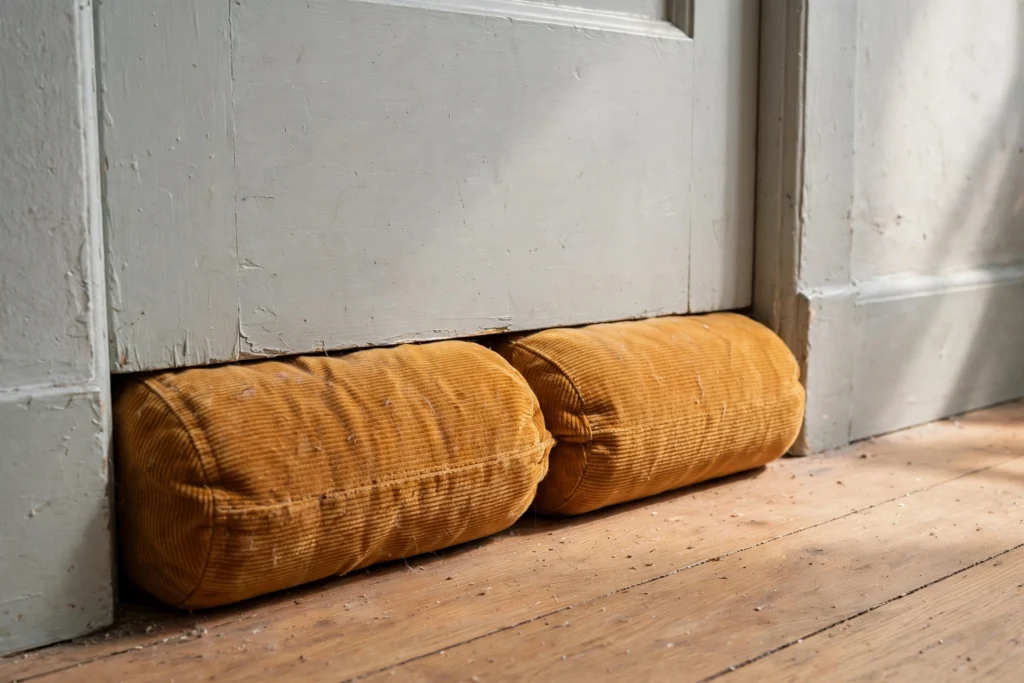
The twin foam design is two foam tubes in a fabric sleeve, one on each side of the door, so it seals whether the cold is coming from the hallway or from outside. A sealed door is quieter too, and the same seals do half the work in our guide to soundproofing a rental, so one fix pays twice. The Holikme twin foam version costs $9.99, checked in November 2026. A single-sided adhesive strip costs less, about $6.98, but adhesive is where rentals get tricky. It can pull paint or leave residue, and it peels in cold or humidity. If you do use an adhesive stopper, test it first on a tiny hidden spot, and keep the packaging so you can show your landlord it is a temporary product.
Fix 2: Rope caulk on window frames
Best for: gaps around window frames that do not move, the ones you found with the candle test.
Main advantage: it is a soft putty cord you press in with your fingers, it seals perfectly, and it peels off cleanly in spring with no residue.
Watch out for: it stops the window opening, so use it only on windows you do not need for daily air. Never block a window you need as a fire escape unless you can pull the caulk out in seconds.
Verdict: the winter MVP for renters. Cheapest fix on this list and the most forgiving to install.
Deposit risk: 1 out of 5. It is made to be removed.
Frost King rope caulk, 45 feet (13.7 m), costs $7.95, checked in November 2026. One roll covers several windows. Press a length into the gap with your fingertips, smooth it with your thumb, and trim the end. In spring, pull it out slowly and the frame is clean. It comes in grey or wood-tone, and it blends in well enough that guests will not notice it. This is the fix to reach for on old windows with uneven gaps, because putty fills whatever shape the gap is, where a straight foam strip cannot.
Fix 3: Self-adhesive foam weatherstrip tape
Best for: straight, even gaps around window sashes and door frames, where the frame closes onto the strip and squeezes it.
Main advantage: the fastest seal on this list. Cut it, peel it, press it on, close the window. Done in minutes per window.
Watch out for: foam only seals when it compresses as the window closes, so pick a thickness that fills the gap without forcing the window. Too thick and the window will not shut properly. Too thin and it does nothing. Clean the frame first, because dust kills the stick.
Verdict: the workhorse for casement windows and door frames. Buy one roll and do every window in the apartment in an hour.
Deposit risk: 2 out of 5. It peels off cleanly from most surfaces if you remove it within one season, but old paint can lift if you leave it for years.
Frost King foam tape, 3/8 inch by 17 feet (10 mm by 5.2 m), costs $4.98. One roll does two or three windows. The foam lasts two to five years before it compresses permanently and stops sealing, which is fine for a rental, because you will replace it each winter anyway. Do not use foam tape on sliding sash windows, where the sash slides past the seal instead of squeezing it. That job belongs to V-strip, fix 7.
Fix 4: Window insulation film kit
Best for: cold glass itself. When the pane is icy to the touch and radiating cold into the room, sealing the frame is not enough.
Main advantage: a clear shrink film taped around the inside of the frame, tightened with a hair dryer until it is drum smooth, adds a trapped air pocket in front of the glass. It is virtually invisible once it is up.
Watch out for: the double-sided tape can pull weak paint on removal, so warm it with the hair dryer before you peel it off in spring. The film also cuts a little daylight and solar heat, so use it on the coldest windows, not every window in the flat.
Verdict: the biggest comfort jump for single-pane windows, and the only fix on this list that tackles the glass, not just the gaps.
Deposit risk: 2 out of 5. The tape is the only risk, and warming it first keeps it low.
The 3M Indoor Window Insulator Kit for five 3 by 5 foot (91 by 152 cm) windows costs $17.66, checked in November 2026. The Duck Brand kit covering up to ten windows costs $14.97, so it is the cheaper per-window buy if you have a lot of glass. Either way, one kit covers the coldest room and the bedroom. Fit the film, shrink it with a hair dryer, and trim the excess. Fifteen minutes per window, and the room stops feeling like it has a cold wall made of glass.

Fix 5: Draft snake for interior doors and windowsills
Best for: interior doors, the gap under a bedroom door, and cold windowsills where air pools at ankle level.
Main advantage: zero installation. It is a weighted fabric tube filled with sand or beads. You lay it down and it works.
Watch out for: you have to move it every time the door opens, and it does nothing for the sides and top of the frame. It is a bottom-gap fix only.
Verdict: the easiest win in the whole post. Buy one for the bedroom door and one for the front door, and move them where the cold is.
Deposit risk: 1 out of 5. It touches nothing at all.
A 36 inch (91 cm) draft stopper costs about $12.33, checked in November 2026. Heavier is better here, because a light snake gets kicked aside. The fabric versions with a washable cover last longer and look like a normal home item rather than a DIY hack, which matters in a small living room where the snake sits in plain sight. If you are handy with a sewing machine, a rolled towel works for a night, but a real snake seals better and stays put.
Fix 6: Thermal curtains on a tension rod
Best for: big, cold windows and patio doors, especially in a living room where you sit near the glass in the evening.
Main advantage: floor-length thermal curtains trap a layer of still air between the fabric and the glass, and a tension rod means no drilling, no screws, and no holes in the wall.
Watch out for: the curtain must reach the floor and overlap the frame on both sides, or it loses most of its effect. Short curtains that stop at the sill are decoration, not insulation. Open them on sunny days so the sun warms the room, then close them as soon as it gets dark.
Verdict: the most visible fix on this list, and the one that makes a room feel warmer even before the thermometer moves. Warm fabric, warm light, no cold glass in your eyeline.
Deposit risk: 1 out of 5. A tension rod leaves no mark at all.
A thermal curtain panel on a tension rod runs about $20 to $40 per panel, which makes it the priciest single fix here, so save it for the one window you sit beside most. Hang the rod inside the frame or just outside it, whichever fits your window, and let the curtain puddle slightly on the floor. That puddle is not sloppy, it is the seal. A pelmet or a closed curtain track with a lid at the top stops warm air sliding down behind the curtain, but a floor-length curtain on its own already does most of the job.
Fix 7: V-strip tension seal for sliding windows and doors
Best for: sliding windows, sash windows, and sliding doors, where the moving part slides past the seal instead of squeezing it.
Main advantage: a folded strip of metal or plastic that springs open to fill the gap, and the sash slides smoothly over it. It lasts far longer than foam.
Watch out for: it is slightly fiddly to install, press it firmly into the groove with a putty knife, and test that each sash still slides freely after sealing. Do not overfill, or the window will stick.
Verdict: the right tool for the window type foam tape cannot handle. If your windows slide, this is your fix, not foam.
Deposit risk: 2 out of 5. It presses into the groove without glue, but test it on one window first and check the paint when you lift it in spring.
V-strip costs $8 to $20 per roll, and a roll does several windows. On a sash window, seal four spots: a brush or V-strip at the meeting rail where the two sashes overlap, V-strip in the side channels, and foam at the top of the upper sash and the bottom of the lower sash. The meeting rail is the most significant draft point on most sash windows, so if you only do one spot, do that one.
The one-afternoon routine: find it, measure it, seal it
If you want this done in a single afternoon instead of spread over a month, follow these seven steps in order. They are the same steps behind every fix above.
- Pick a cold, windy day. Close every window and exterior door, turn the heating off for 10 minutes, and let the air settle.
- Run the candle test around every window frame, door frame, skirting board, and outlet on an outside wall. Mark each leak with masking tape.
- Run the paper test on every door and window that moves. If the paper slides out easily, the seal is weak there.
- Measure each gap with a ruler, or stack paper sheets until they fill the gap and measure the stack. Write the widths down, biggest first.
- Buy the starter kit: rope caulk, a slide-on door stopper, and one roll of foam tape. That is $22.92 and it covers the worst leaks in a one-bedroom apartment.
- Seal the doors first, then the windows, biggest gap first. Doors first because the under-door gap is usually the largest single hole.
- Check your work on the next cold morning. Sit where you sit in the evening and feel for the ankle-level stream. If it is gone, you are done, and that is how to draft proof a rental apartment in a single afternoon. If it moved, the next gap on your list is the culprit. And watch the windows for condensation, because a well-sealed room holds more moisture.
What does it cost? The starter kit and the full kit
Prices checked in November 2026 on Amazon US. Your prices will vary a little by store and by country, but the shape of the table holds: the starter kit is under 25 dollars, and the full kit for a whole small apartment is just over 60.
| Item | Price | Covers |
|---|---|---|
| Frost King rope caulk, 45 ft | $7.95 | Several windows |
| Holikme twin foam under-door stopper | $9.99 | One door |
| Frost King foam weatherstrip tape, 17 ft | $4.98 | Two to three windows |
| Starter kit total | $22.92 | One bedroom, biggest wins |
| 3M window insulation film kit, 5 windows | $17.66 | Coldest windows |
| Second door stopper (MAXTID, 36 in) | $12.33 | Second door |
| Second rope caulk roll | $7.95 | Remaining windows |
| Full winter kit total | $60.86 | Whole small apartment |
For scale, the Energy Saving Trust estimates professional draught proofing of a whole house at around 250 pounds, saving around 55 pounds a year. The renter version costs a quarter of that and you keep every bit of it, because it all comes with you or peels off at move-out. In the US, the Department of Energy runs a Weatherization Assistance Program that can cover weatherization free for eligible renters, so if your income qualifies, ask about it before you spend anything. Renters already spend 15 to 25 percent more on utilities than homeowners in similar homes, according to the Energy Information Administration, which is one more reason the 23 dollar starter kit is money well spent.
Mistakes to avoid
Sealing the vents that are meant to stay open. Trickle vents, extractor fans, air bricks, and gas appliance vents exist for a reason. Sealing them traps moisture and fumes. Seal uncontrolled drafts, never ventilation.
Using permanent caulk or screws. Regular caulk, silicone, and screw-on sweeps are landlord jobs. In a rental they are deposit damage. If a product needs a drill, it is not a renter fix.
Picking foam tape that is too thick. If the window will not close properly after you fit the strip, the strip is too thick. Forcing the window closed rips the strip off and can crack the frame. Measure the gap first, then buy the thickness.
Rope caulk on a window you open every day. It seals the window shut. Use it on the windows you leave closed all winter, and keep at least one window free for fresh air. Never block a fire-escape window.
Sealing the place airtight and ignoring the moisture. A well-sealed room holds the steam from showers, cooking, and drying clothes. If you wake up to wet windows, you have sealed well and ventilated badly. Open a window for a few minutes each morning and keep the room under 60 percent humidity, or the draft fix becomes a mold problem. If the air stays damp even then, the best dehumidifier for small apartments is the companion buy, and our guide to condensation on rental windows explains the balance.
Buying before measuring. A 25 dollar roll of the wrong thickness is worse than useless, because it sits in a drawer while the draft keeps blowing. The paper test takes two minutes. Do it first.
What to skip
A chimney balloon if you have no fireplace. Most apartments do not have one, and the ones that do often have it sealed already. Skip it unless you can feel cold air coming down an open flue.
Screw-on door sweeps. They work, and they last for years, but they need screws in the door, which is a deposit risk no renter needs when a slide-on stopper does the same job for 10 dollars.
A space heater as the first fix. A heater warms the air that is leaking out of the gaps. Seal first, then heat what is left. Heating a drafty room is like filling a bath with the plug out.
Cheap single-use film for every window. Film is for the coldest glass, not for every pane in the flat. Seal the frames first, film the worst one or two windows, and leave the rest.
Doing nothing because the flat is small. Small rooms are where drafts hurt most, because there is nowhere to sit away from the cold stream. A one-bedroom apartment is also the cheapest to seal, which is why the starter kit is 23 dollars and not 230.
When the draft is your landlord’s problem
Some drafts are not yours to fix. A warped sash that will not sit square, rotten wood, missing exterior caulk you cannot reach, failed glazing, or a gap wider than an inch under a door are building problems, not tenant problems. If you spot any of those, stop, take photos, and write to your landlord before you spend anything.
Check your lease first, like any renter project. Most leases allow removable, non-damaging fixes without permission, but read the clause on alterations before you stick anything to a painted frame. If the lease is silent, a short written note to the landlord costs nothing and protects you later: what you found, what you plan to fit, that it is removable, and that you will take it out at move-out. Keep the product packaging and take a photo of every frame before and after, so there is no argument about what was already worn.
Draft proofing sits alongside the other renter-friendly home upgrades that make a rental feel like yours without touching the deposit. If the landlord agrees to fix the structural side, great. If they will not, the seven fixes above still make the place livable, and none of them gives the landlord a reason to touch your deposit. That is the whole point of learning how to draft proof a rental apartment the removable way: you get the warm room, and you hand the flat back exactly as you found it.
How this was made: this guide was researched from live search results and manufacturer product pages in November 2026, with prices checked on Amazon US the same week. The gap math is our own calculation from standard door sizes. No products were tested in person and no hands-on claims are made.
Sources: Energy Saving Trust draught proofing guidance and winter preparation guide (https://energysavingtrust.org.uk/five-things-you-should-do-to-prepare-your-home-for-winter/); Avista Utilities on rope caulk and the 1/8 inch gap comparison (https://www.myavista.com/connect/articles/2021/12/at-home-with-lisa-window-caulk); US Department of Energy Weatherization Assistance Program; Energy Information Administration renter utility spending figures, both via smartweatherize.com; howtogosolar.org draught proofing guide for material lifespans and costs.
Is draft proofing worth it for renters?
Yes, and that is the short answer to how to draft proof a rental apartment as a renter. Rope caulk, foam tape, draft snakes, and window film all install without permanent changes and come off cleanly in spring. The Energy Saving Trust puts the saving from draught proofing windows, floors and doors at around 55 pounds a year in Great Britain, and a 23 dollar starter kit pays for itself in weeks in a cold climate. You keep the comfort all winter and you keep your deposit at move-out.
Will I lose my security deposit for draft proofing?
No, as long as every fix is removable. Slide-on stoppers, draft snakes, rope caulk, and tension rods touch nothing permanently. Foam tape and window film use adhesive, so test each one on a tiny hidden spot first, warm the film tape with a hair dryer before peeling it off in spring, and keep the packaging to show it is a temporary product. Photograph every frame before you start, so you can prove what was already worn.
Can I draft proof a rental without drilling?
Yes, all seven fixes in this guide need no drilling, no screws, and no nails. Slide-on door stoppers, draft snakes, rope caulk, foam tape, shrink film, thermal curtains on a tension rod, and V-strip all press, slide, or hang into place. If a product needs a drill, it is a landlord job, not a renter fix.
Is draft proofing the landlord’s responsibility?
It depends on the cause. Removable sealing, the kind in this guide, is normally the tenant’s job and most leases allow it. Structural defects are the landlord’s: a warped sash, rotten wood, missing exterior caulk, failed glazing, or a gap wider than an inch. If you find those, write to your landlord with photos before you spend anything, and keep a copy of the message.