Does Peel and Stick Backsplash Damage Walls? The Honest Renter Answer
If you are staring at a kitchen wall covered in stick-on tile and wondering whether move-out day will end in tears, here is the short answer. In most rentals, does peel and stick backsplash damage walls? Usually no, as long as the wall underneath was sound and you remove the tiles with heat and patience. The risk is real, but it is concentrated in a few specific situations, and this post names them so you can check yours before you peel a single tile.
The original element in this post is a per-surface damage-risk table plus a removal kit priced from live-checked November 2026 prices, with a total of $19.74. No competitor in the top results puts the surface ratings, the removal steps, and the dated cost table in one place.
Does peel and stick backsplash damage walls?
Direct answer: On a cured, painted wall or glazed tile, a peel and stick backsplash usually comes off with little or no damage. On fresh paint, unprimed drywall, or crumbling plaster, it can pull paint and tear the drywall paper, and that is where repair costs start.
Why does this happen? Peel and stick tiles use a pressure-sensitive adhesive, the same family of glue as strong tape. The adhesive bonds to whatever it touches. If the paint bond to the wall is weaker than the adhesive bond to the paint, the paint comes with the tile. If the wall surface is sound, the adhesive gives up first and the wall survives.
One honest correction to the usual advice: “renter friendly” does not mean “zero risk.” It means removable with care, not removable with force. The difference between a clean wall and a repair job is usually heat, angle, and speed, which the steps below cover.
Which surfaces are safe, and which are risky?
Before you touch a tile, find your wall type in this table. This table is the real answer to does peel and stick backsplash damage walls, because the risk changes completely with the surface. The deposit-risk rating runs from 1 (landlord will likely never notice) to 5 (expect a repair and possibly a deposit deduction if you skip the fix).
| Wall surface | Damage risk | Deposit risk 1 to 5 | Notes |
|---|---|---|---|
| Painted drywall, paint cured 30+ days | Low | 1 | The safest common case. Heat and slow peeling usually leave the paint intact. |
| Glazed ceramic tile underneath | Very low | 1 | Adhesive releases cleanly from glaze. Wipe residue and you are done. |
| Primed drywall (primer, no topcoat) | Low to medium | 2 | Primer grips better than bare drywall, but soft primer can scuff. |
| Fresh paint, under 30 days | High | 4 | Paint has not fully cured, so it peels with the tile. Wait if you can. |
| Unprimed, bare drywall | High | 5 | The adhesive can tear the paper face of the drywall. Maker care sheets warn against this surface directly. |
| Textured walls or crumbling plaster | High | 4 | Tiles grip unevenly and the weak top layer comes away in patches. |
| Wallpaper underneath | High | 5 | The tile will likely take the wallpaper with it. Do not install here if you rent. |
If your wall is in the top three rows, proceed with confidence. If it is in the bottom four, read the repair section first, take move-out photos before you start, and budget an extra hour for patching.
For the install side of this project, our peel and stick backsplash installation guide covers surface prep in detail, and it is worth a read before your next install so removal is easier next time.
How to remove peel and stick backsplash without damaging walls
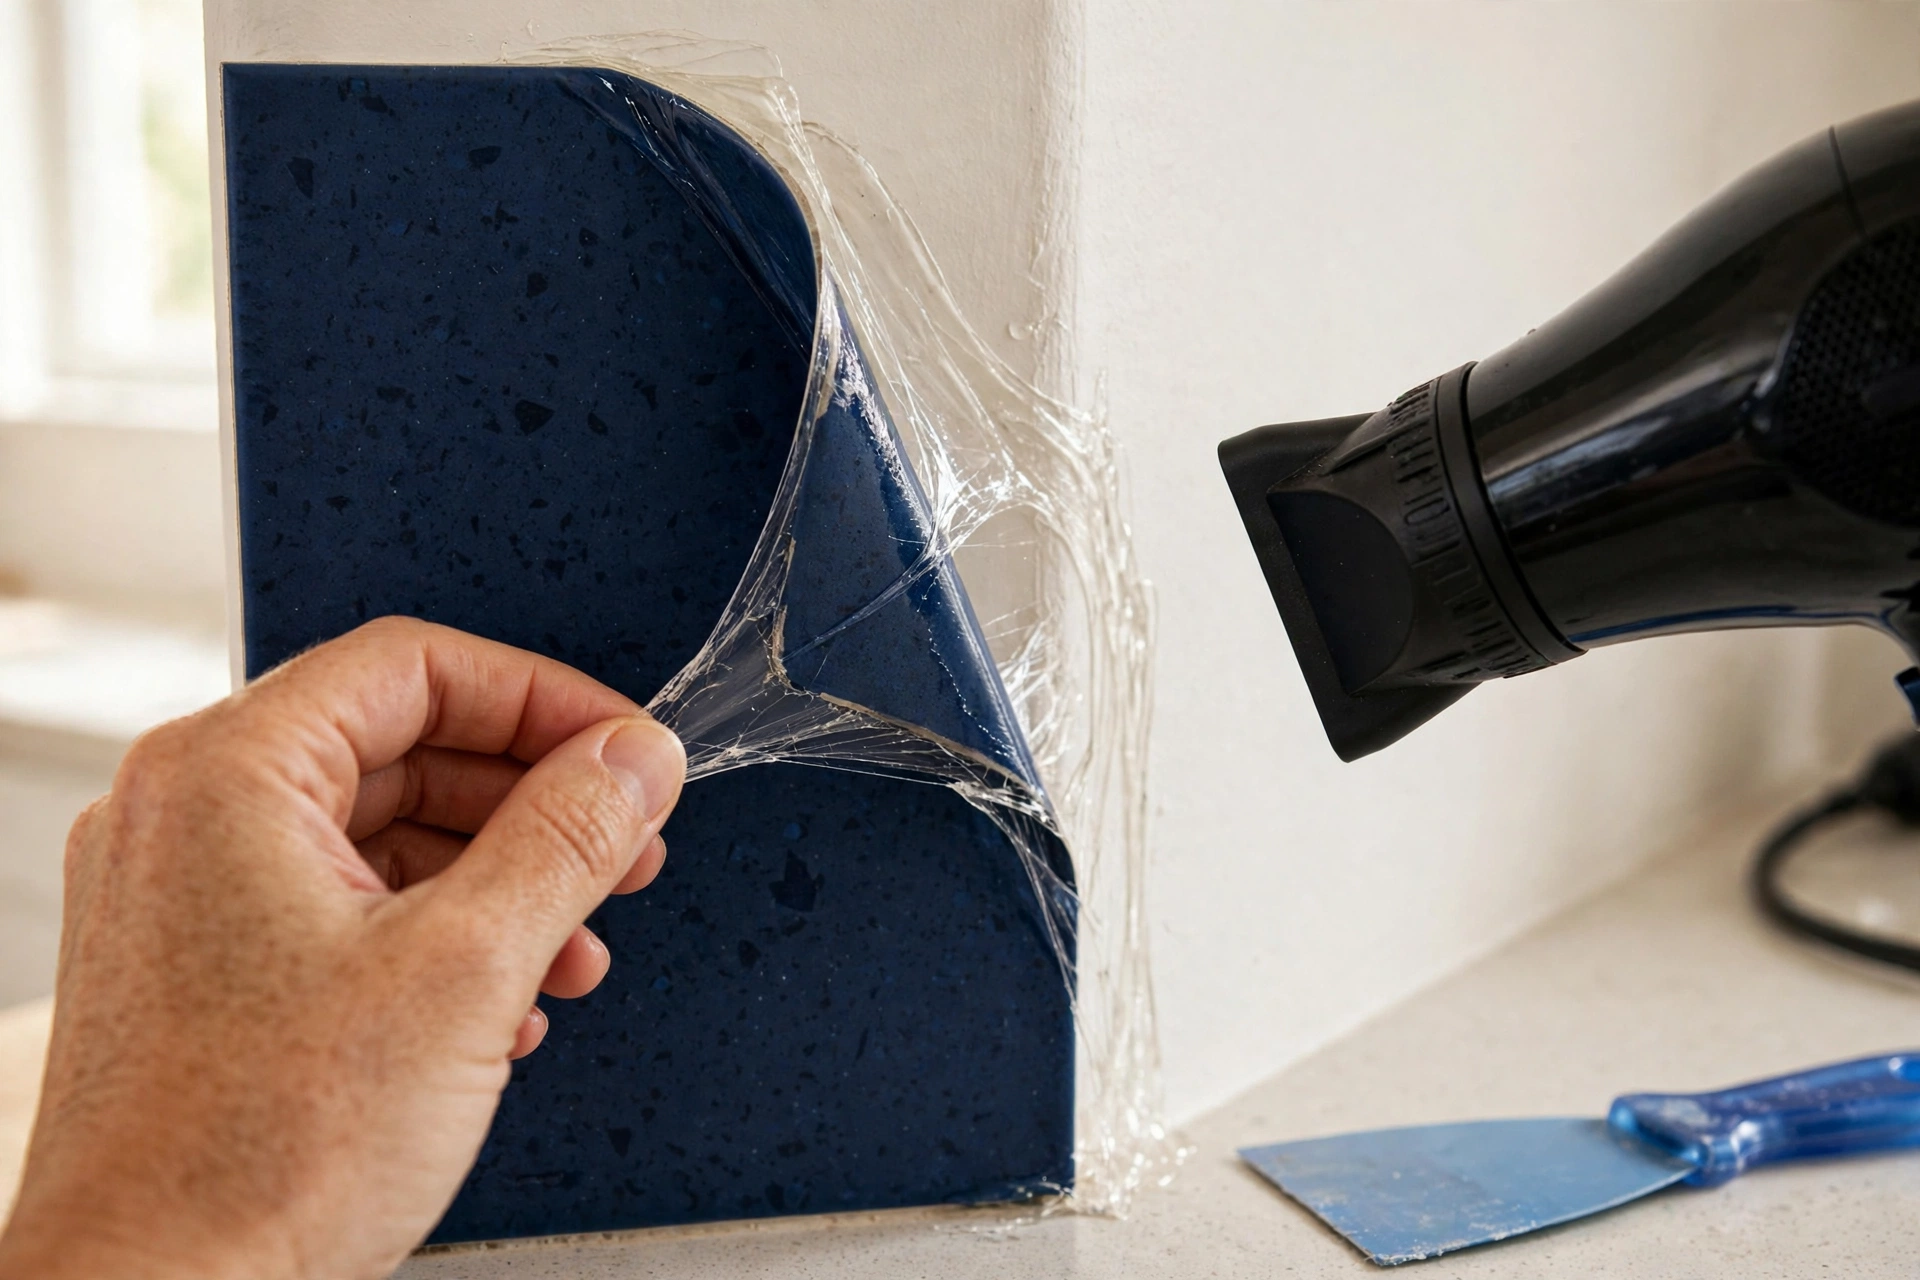
Direct answer: For the full process, see how to remove peel and stick backsplash, where you heat one tile at a time with a hair dryer, lift a corner with a plastic putty knife, and peel slowly at a shallow angle while the heat stays just ahead of the peel line. Follow these steps and the question of does peel and stick backsplash damage walls answers itself with a clean wall. Then roll the residue off with a citrus adhesive remover instead of scrubbing.
Materials list
- Hair dryer (a heat gun on its lowest setting also works, but keep it moving)
- Plastic putty knife, not metal, so you do not gouge the wall
- Citrus adhesive remover, such as Goo Gone
- Clean cloths and a bucket of warm soapy water
- Painter’s tape and a drop cloth for the counter
- Spackle, a small putty knife, and fine sandpaper, just in case
- Phone camera, for before photos
7 steps
- Step 1: Photograph the wall first. Take close photos of every section before removal. If a dispute about prior damage ever comes up, these photos are your evidence.
- Step 2: Clear and protect the area. Move small appliances away, tape the counter edge, and lay the drop cloth. Turn off power to any outlets in the splash zone and tape over them while you work nearby.
- Step 3: Heat one tile for 30 to 60 seconds. Hold the hair dryer about 15 cm (6 in) from the tile and move it slowly. You want the tile warm and flexible, not hot. Heat softens the adhesive so it releases instead of tearing.
- Step 4: Lift a corner with the plastic knife. Slide the knife flat under a corner and lift gently. If it resists, heat for another 30 seconds. Never force a cold tile.
- Step 5: Peel slowly at a shallow angle. Pull the tile back close to the wall, not straight out toward you. Peeling at a low angle keeps the force on the adhesive, not on the paint. If you feel resistance, stop and reheat. This is the step where patience pays for itself.
- Step 6: Remove residue before it hardens. While the wall is still slightly warm, rub the sticky film with a cloth dampened with citrus adhesive remover. Test the remover on a hidden spot first to make sure it does not dull the paint. Then wash the wall with warm soapy water.
- Step 7: Inspect in raking light. Hold a lamp or your phone light at an angle to the wall. Raking light shows torn paper, scuffs, and leftover adhesive that overhead light hides. Fix what you find now, not on moving day.

A detailed removal walkthrough from EngineerFix matches this method and adds the same warning about torn drywall paper, which is worth reading if your wall is older plaster or unprimed drywall.
What to do if paint peels off with the tile
Direct answer: Small paint peels are a normal repair, not a disaster. Seal any torn drywall paper with primer first, then spackle, sand, and touch up the paint. Skipping the primer is the mistake that makes the patch bubble.
- Step 1: Seal torn paper. If you see brown, fuzzy drywall paper, brush a thin coat of primer or primer-sealer over it and let it dry. Bare paper soaks up water from spackle and paint and bubbles, so this step is not optional.
- Step 2: Spackle thin. Apply spackle in a thin layer with the putty knife, slightly wider than the damaged spot. Let it dry fully, then sand lightly with fine sandpaper until smooth.
- Step 3: Prime and paint. Prime the patched area, then roll on matching paint. If you do not have the original paint, a small sample pot matched at a paint store is usually enough for a backsplash strip, and it costs far less than a deposit deduction.
- Step 4: Photograph the repair. Take after photos in the same raking light. A clean, documented repair is much easier to defend than a wall you hope nobody inspects.

How much does removing a peel and stick backsplash cost?
Direct answer: A basic removal kit costs about $19.74 at November 2026 prices, and most renters already own the hair dryer. Repair materials only add cost if paint actually peels.
| Item | Price as of November 2026 | Notes |
|---|---|---|
| Goo Gone Citrus Spray Gel, 12 oz | $6.29 | Target listing, checked November 2026 |
| DAP DryDex spackling, 8 oz | $5.47 | Target listing, checked November 2026 |
| Basic plastic putty knife set | About $7.98 | Budget sets run in this range |
| Hair dryer | $0 if you own one | Borrow one before buying a heat gun |
| Total removal kit | $19.74 | 6.29 + 5.47 + 7.98 = 19.74 |
| Touch-up paint, sample pot | About $5 to $10 | Only if paint peels; match the existing color |
Time estimate: plan 1 to 2 hours for a standard 3 m (10 ft) run of backsplash, plus drying time if you need to patch and paint. Removal itself is the fast part. Residue cleaning and any patching take the rest.
Mistakes to avoid
Pulling cold tiles. Cold adhesive tears paint. If a tile resists, it needs more heat, not more force.
Using a metal scraper on drywall. A metal edge digs into the paper face in one slip. Plastic is slower and far more forgiving.
Scrubbing residue aggressively. Hard scrubbing dulls paint and can tear softened paper. Let the citrus remover dissolve the glue, then wipe.
Skipping the primer on torn paper. This is the repair mistake that turns a small peel into a bubbled patch that shows through paint.
Removing tiles the week before moving out. Give yourself a buffer. If a repair needs a second coat or a paint match, you want days, not hours.
What to skip
Steam cleaners and boiling water. They sound thorough, but they push moisture into drywall paper and seams. Heat from a dryer is controlled and dry.
Strong solvents on painted walls. Acetone and similar solvents can dissolve paint along with the adhesive. Citrus remover and rubbing alcohol are gentler starting points, and always test first.
Reusing peeled tiles elsewhere. Once the adhesive has been heated and pulled, it rarely bonds evenly again. Save yourself the falling-tile problem and start fresh.
Full-wall repainting for one small peel. A matched touch-up on the damaged strip usually blends fine, especially behind a counter where the eye does not linger. Repaint the whole wall only if the damage is widespread.
Renter check: lease, deposit, and move-out photos
Direct answer: Check your lease for alteration and restoration clauses before removal, photograph everything before and after, and keep receipts for repair materials. Most leases require the unit returned in its original condition, minus normal wear and tear, and a documented repair counts as restored.
Our lease and deposit guide explains the difference between wear and tear and chargeable damage, which matters here: if anyone asks does peel and stick backsplash damage walls, the honest answer is that it depends on the surface and the removal method, and a clean removal with a touched-up spot reads as wear and tear in most cases, while torn drywall left bare reads as damage. The same habit that helps with taking adhesive hooks down cleanly applies here too: slow removal, photo proof, and a repair before the final walkthrough.
If your lease bans adhesive products outright, be honest with yourself about the risk before your next install, and weigh that against the peel and stick vs paint for renters comparison when you choose your next kitchen refresh. For this removal, though, the job is the same: heat, slow peel, clean residue, repair what peeled, and document it.

Will peel and stick backsplash damage walls when removed?
Usually no, on cured painted walls or glazed tile, if you remove it with heat and peel slowly. Fresh paint, unprimed drywall, wallpaper, and crumbling plaster are the risky surfaces where paint or paper can come away with the tile.
How do I remove peel and stick backsplash without damaging the wall?
Heat one tile at a time with a hair dryer for 30 to 60 seconds, lift a corner with a plastic putty knife, and peel slowly at a shallow angle while the heat stays ahead of the peel line. Then remove residue with a citrus adhesive remover and wash with warm soapy water.
Does peel and stick tile ruin walls?
It can, but usually only on weak surfaces or when pulled off cold and fast. On a sound wall with careful removal, the wall survives and any small scuff is a quick spackle and touch-up job.
Can you put peel and stick backsplash on painted drywall?
Yes, painted drywall is one of the best surfaces for it, as long as the paint has cured for at least 30 days. Avoid fresh paint, unprimed drywall, textured walls, and wallpaper, where adhesion and removal both cause trouble.
How this was made: this guide was researched from manufacturer care sheets and removal guides, priced from live store listings in November 2026, and written in our own words. No product was tested by us and no affiliate links are used.